


Chapter 16: Starting a Web Browser Management Session
200 Section II: Using the Web Browser Interface
Establishing a Remote Connection to Use the Web Browser Interface
In order for you to manage a switch using the web browser interface, the
switch must have an IP address and subnet mask. To manually assign an
IP address, refer to “Configuring the IP Address, Subnet Mask, and
Gateway Address” on page 32. To configure the switch to obtain its IP
configuration from a DHCP server, refer to “Enabling and Disabling the
DHCP Client” on page 35. The initial assignment of an IP address must be
made through a local management session.
Note
Enhanced stacking, a feature of other Allied Telesis Layer 2 and
Layer 2+ managed switches, is not supported by the AT-9000/24
Gigabit Ethenet switch.
Note
The remote management station must be a member of the switch’s
Default VLAN. The switch responds and processes management
packets only if they are received on an untagged port of the Default
VLAN.
To start a web browser management session, perform the following
procedure:
1. Start your web browser.
Note
If your PC with the web browser is connected directly to the switch to
be managed or is on the same side of a firewall as the switch, you
must configure your browser’s network options not to use proxies.
Consult your web browser’s documentation on how to configure the
switch’s web browser to not use proxies.
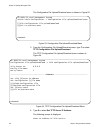
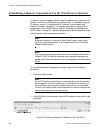
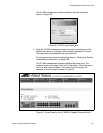
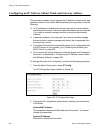
2. In the URL field of the browser, enter the IP address of the switch to be
managed.
Figure 55. Entering a Switch’s IP Address in the URL Field
Switch’s IP Address