


AT-S84 Management Software User’s Guide
Section I: Using the Menus Interface 89
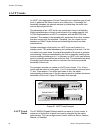
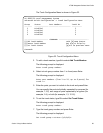
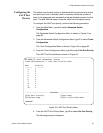
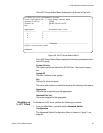
The Trunk Configuration Menu is shown in Figure 22.
Figure 22. Trunk Configuration Menu
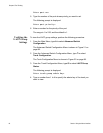
3. To add a trunk member, type A to select Add Trunk Member.
The following prompt is displayed:
Enter trunk group number>
4. Select a trunk group number from 1 to 4 and press Enter.
The following prompt is displayed:
Enter port members (from 1 to 24, up to 8 ports) for
trunk
n
>
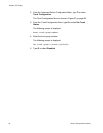
5. Enter the ports you want to include in the trunk and press Enter.
You can specify the ports individually separated by commas (for
example, 1,2,5), as a range of ports separated by a hyphen (for
example, 2-4), or both (for example, 1,3, 12-16).
6. To set the trunk status, type S to select Set Trunk Status.
The following prompt is displayed:
Enter trunk group number>
7. Type the trunk group number and press Enter.
The following prompt is displayed:
Set trunk group
n
status (A/P/M/D)>
AT-9000/24 Local Management System
Advanced Switch Configuration -> Trunk Configuration Menu
Group Status Port Members Trunk ID
------- -------------- --------------------- ----------
1 Disabled 1
2 Disabled 2
3 Disabled 3
4 Disabled 4
----------------------- <COMMAND> -----------------------------
[A]dd Trunk Member LACP [G]roup Status
[R]emove Trunk Member Set P[o]rt Priority
[S]et Trunk Status [Q]uit to previous menu
Command>