


9-36 Installation and Maintenance Volume
Octel 200/300 S.4.1 PB60019−01
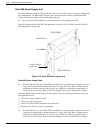
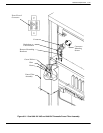
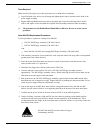
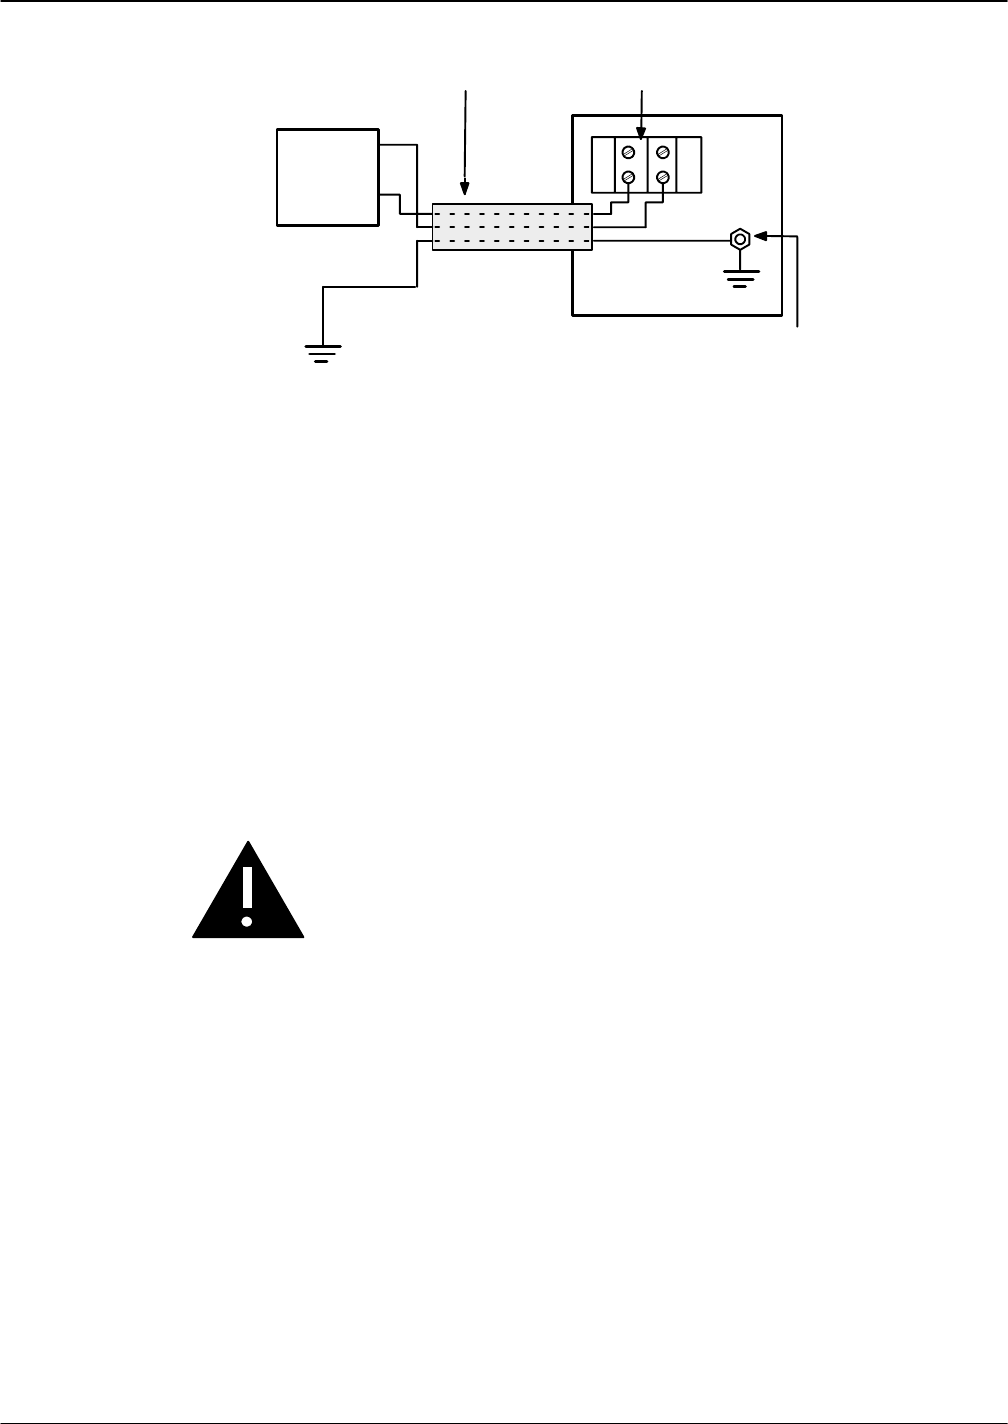
DC
Power
Source
Earth Ground
Conduit with three
10-gauge wires
Ground Stud
+−
−
+
Rear Panel
Terminal Block
Figure 9-24 Field Wiring for −48 VDC Powered Octel 300
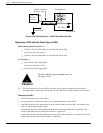
Replacing a PSU with the Same Type of PSU
Follow this procedure if you have a
- 120 VAC, 230 VAC (Octel 200), or 240 VAC PSU (Octel 300)
and you are replacing it with a
- 120 VAC, 230 VAC (Octel 200), or 240 VAC PSU (Octel 300)
or if you have a
- 100−240 VAC Auto-ranging PSU
and you are replacing it with a
- 100−240 VAC Auto-ranging PSU
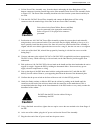
Caution!
The PSU is not hot pluggable. Do not remove the
PSU when it is ON.
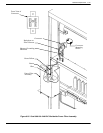
. If you are replacing any type of PSU in the Octel 300 you must also replace the Power Filter
Assembly. Refer to Octel 300 120 VAC and 240 VAC PSU Power Filter Assembly in this section.
Removing the PSU
1. Unlock and open the door of the cabinet.
2. Put on an antistatic wrist strap. Connect it to an unpainted portion of the cabinet.
3. Turn OFF the power to the message server at the switch on the front of the PSU. The switch for the
PSU is a circuit-breaker rocker switch.
On the Octel 200, the switch is OFF when the bottom of the rocker, marked 0, is pressed in. The
switch is ON when the top of the rocker, marked 1, is pressed in.
On the Octel 300, the switch is OFF when the side of the rocker, marked 0, is pressed in. The switch
is ON when the side of the rocker, marked 1, is pressed in.