9-38 Installation and Maintenance Volume
Octel 200/300 S.4.1 PB60019−01
8. Reattach the floppy disk drive signal cable.
9. When all other message server maintenance has been accomplished, turn ON the message server at
the PSU switch. Measure the voltages on the front of the CPU, as described in the Installation
chapter, Octel 200/300 Hardware Installation section.
10. Close and lock the door of the cabinet.
Replacing a PSU with a Different Type of PSU
Follow this procedure if you have a
- 120 VAC, 230 VAC (Octel 200), or 240 VAC PSU (Octel 300)
and you are replacing it with a
- 100−240 VAC auto-ranging PSU
Caution!
The PSU is not hot pluggable. Do not remove the
PSU when it is ON.
100−240 VAC Auto-ranging PSU Replacement Kits
The lists below show the components included in the 100−240 VAC auto-ranging PSU Replacement Kits.
There are two separate Replacement Kits, one for the Octel 200 and one for the Octel 300.
Octel 200 120/230 VAC PSU Replacement Kit Part Number FK90246
Item Number Description Quantity
740−6640−000 Assembly, Floppy/Power Supply, 100−240 VAC 1
072−1400−000 Fuse, 50X20MM, 6.3A, 250 VAC, Slowblow 1
445−6277−001 Label, 100−240 VAC Input, UL 1
FI90146−01 Procedure to Install 100−240 VAC PSU 1
Octel 300 120/240 VAC PSU Replacement Kit Part Number FK90247
Item Number Description Quantity
740−6641−000 Assembly, Power Supply, 100−240 VAC 1
740−6038−001 Assy, Power Filter, 100−240 VAC Worldwide, Harbor Blow 1
445−6276−001 Label, Warning, High Leakage Current 1
FI90146−01 Procedure to Install 100−240 VAC PSU 1
Caution!
The PSU is sensitive to static electricity. Do not
attempt the following procedures without wearing an
antistatic wrist strap.
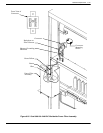
. If you are replacing any type of PSU in the Octel 300 you must also replace the Power Filter
Assembly. Refer to Octel 300 120−240 VAC Auto-ranging PSU Power Filter Assembly in this
section.


