Copying
4-4
Basic Copying Method
Basic Copying Method
This section describes the basic procedure for copying.
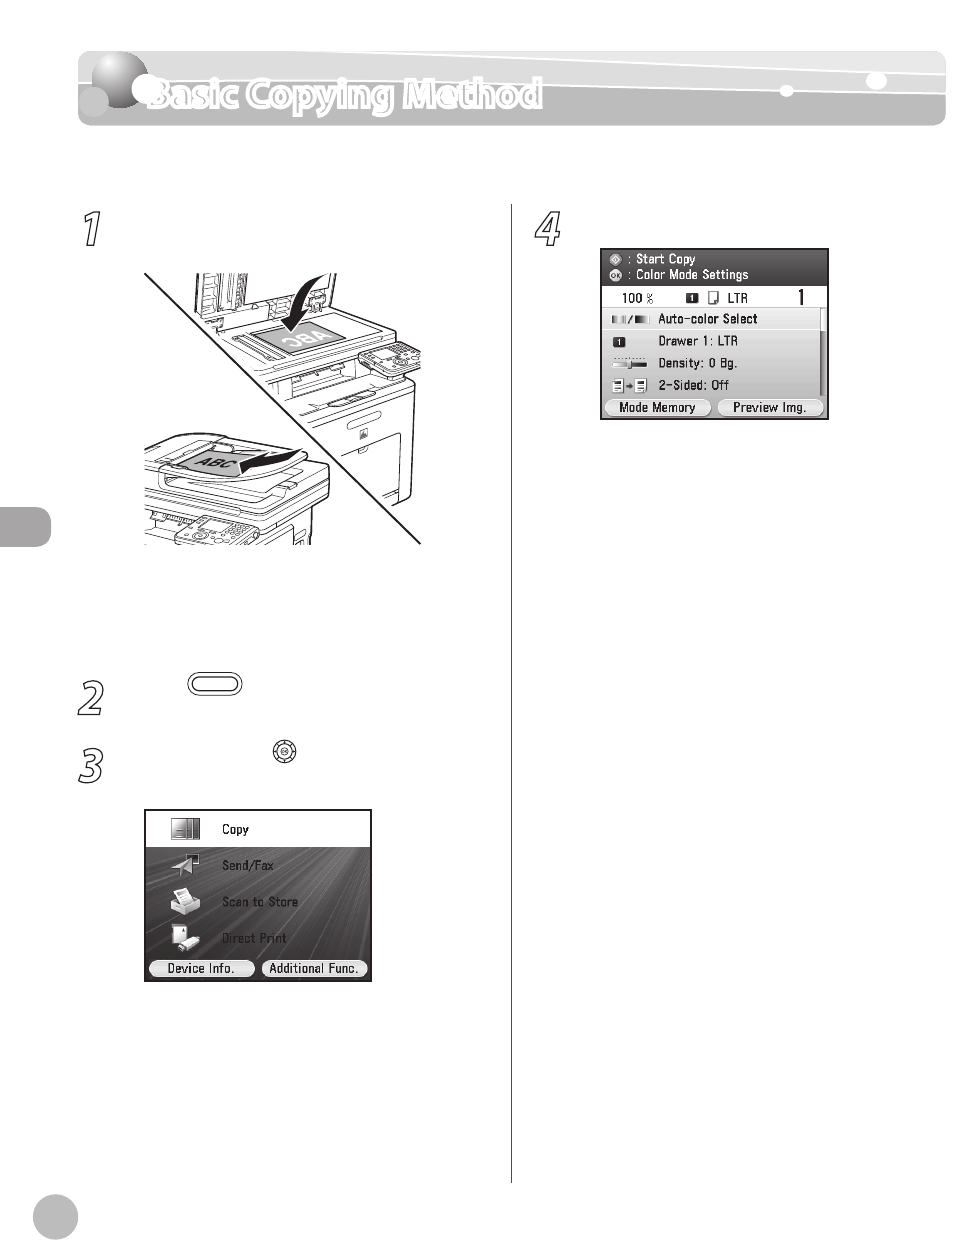
1
Place originals on the platen glass or load
it them in the feeder.
For details, see “Placing Originals,” on p. 2-4.
Close the feeder after placing your originals.
For originals you can copy, see “Originals
R
equirements,” on p. 2-2.
2
Press (Main Menu).
3
Use [▼], [▲] or (Scroll Wheel) to select
<Copy>, then press [OK].
–
–
–
4
Make the copy settings you require.
You can specify the following settings:
<Color Mode Settings>: Species the color or
B&W. (See “S
electing Color Mode,” on p. 4-7.)
<Paper Source Settings>: Species the paper
source. (See “S
electing Paper Source,” on p. 4-
9.)
<Density/Background Rem. Set.>: Adjusts the
density and the background color of originals.
(See “A
djusting Density,” on p. 4-17)
<Various 2-Sided Settings>: Makes two-sided
copies. (See “2-Sided C
opying,” on p. 4-22.)
<Copy Ratio Settings>: Adjusts the size by
enlarging/reducing original images. (See
“Enlar
ge/Reduce Images,” on p. 4-30.)
<Original Image Quality Settings>: Species
the image type of originals. (See “Selecting
I
mage Quality,” on p. 4-34.)
<Copy Multiple Pages onto 1 Page>: Reduces
multiple originals to t on one sheet of paper.
(See “Multiple Originals onto One Sheet (N on
1),
” on p. 4-36.)
<Sharpness Settings>: Adjusts the contrast of
the originals. (See “Adjusting Sharpness,” on
p
. 4-39.)
<Shadow/Frame Erase Settings>: Erases
unnecessary shadows and lines. (See “Erasing
Shado
ws/Lines,” on p. 4-41.)
<Color Adjustment>: Adjusts the color
balance for the copy. (See “Adjusting Color
Balance
,” on p. 4-51.)
<Finishing Settings>: Sorts copies into sets.
(See “C
ollating Copies,” on p. 4-57.)
–
–
–
–
–
–
–
–
–
–
–


