Fax
5-18
Sending Fax Documents
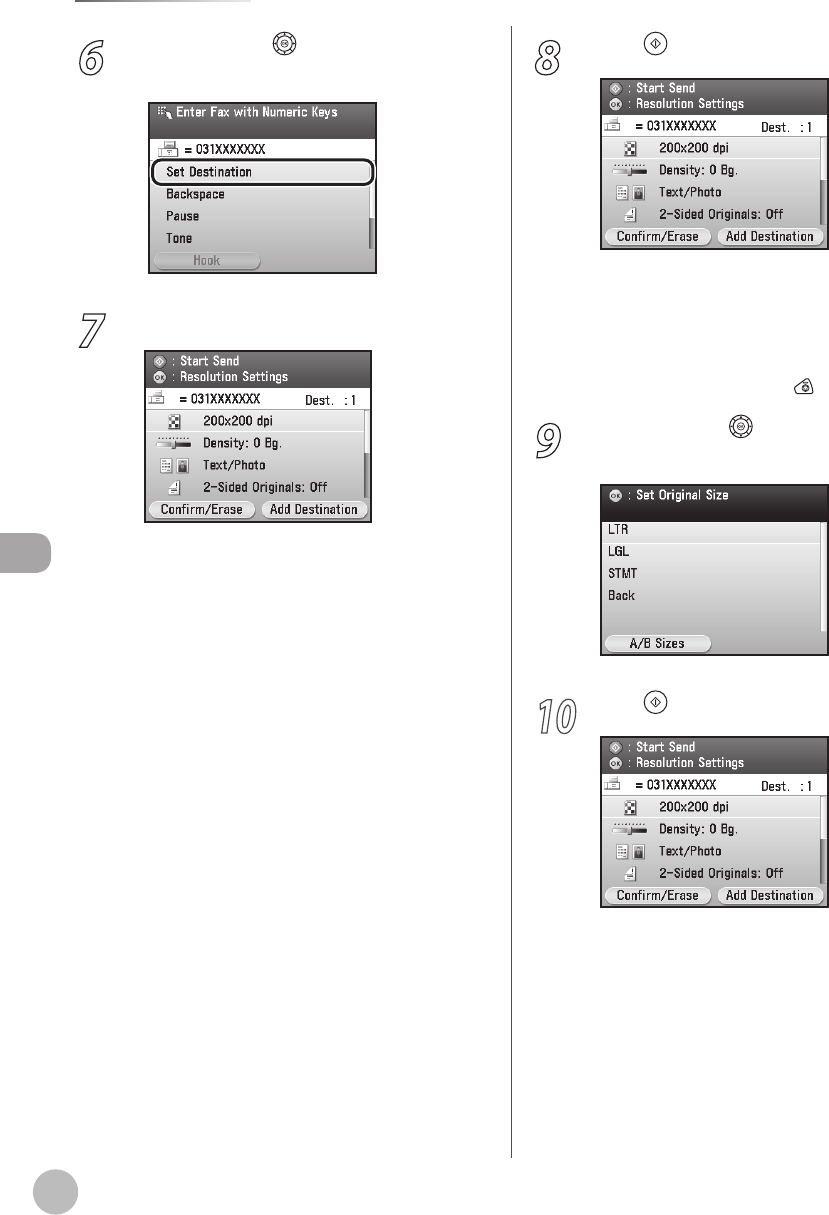
6
Use [▼], [▲] or (Scroll Wheel) to select
<Set Destination>, then press [OK].
7
Make the scan settings you require.
You can specify the following settings:
<Resolution Settings>: Adjusts the resolution
of originals. (See “Selecting Resolution,” on
p
. 5-41.)
<Density/Background Rem.Set.>: Adjusts the
density and the background color of originals.
(See “A
djusting Density,” on p. 5-42.)
<Original Image Quality Settings>: Adjusts the
image quality of originals. (See “Selecting
I
mage Quality,” on p. 5-45.)
<2-Sided Orig. Orientation Set.>: Scans two-
sided originals for sending. (See “2-Sided
Or
iginal,” on p. 5-47.)
<Delayed TX Settings>: Sends scanned
documents at a specied time. (See “Sending
Originals at a Preset Time (Delayed Sending),”
on p
. 5-49.)
<Direct Send Settings>: Sends each page of
the document to the destination as it is
scanned. (See “Dir
ect Sending,” on p. 5-52.)
<Register Favorites>: Stores frequently used
send settings for future use. (See “Favorites,” on
p
. 5-54.)
–
–
–
–
–
–
–
8
Press (Start)
Scanning starts if the original is placed in the
feeder, and the scanned data is sent to the
specied destination when scanning is
complete.
To cancel scanning, press the left Any key to
select <Cancel> or press
(Stop).
9
Use [▼], [▲] or (Scroll Wheel) to select
the original size, then press [OK].
10
Press (Start).
–
–


