Before Using the Machine
1-3
Machine Components
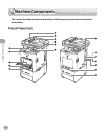
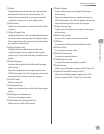
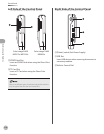
①Feeder
Originals placed in the Feeder are automatically
fed sheet by sheet to the scanning area. The
feeder also automatically turns over two-sided
originals to make one- or two-sided copies.
②Slide Guides
Adjust the slide guides to match the width of the
originals.
③Original Supply Tray
Originals placed here are automatically fed sheet
by sheet to the scanning area of the platen glass.
Place originals into this tray with the surface that
you want to scan face up.
④Original Output Tray
Originals that have been scanned from the
original supply tray are output to the original
output tray in the order that they are fed into the
feeder.
⑤Original Stopper
Prevents the originals from falling o the paper
delivery tray.
Open the stopper from its original position for
LTR/A4 size paper. For LGL size paper, pull out the
extension rst, and then open the stopper.
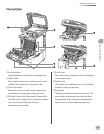
⑥Control Panel
Machine controls.
⑦Stack Bypass Tray
Feeds non-standard size or thick/thin type paper
stacks.
⑧Stack Bypass Tray Extension
Pull out to load paper stack.
⑨Slide Guides for Stack Bypass Tray
Adjusts to the width of the paper.
⑩Paper Stopper
Prevents the paper from falling o the paper
delivery tray.
Open the stopper from its original position for
LTR/A4 size paper. For LGL size paper, pull out the
extension rst, and then open the stopper.
⑪Paper Delivery Tray
Copies, prints and faxes are output to the paper
delivery tray.
⑫Main Power Switch
Press to the “I” side to turn the power ON.
⑬USB Port
Connect the USB (Universal Serial Bus) cable.
⑭Ethernet Port
Connect the network cable.
⑮External Device Jack
Connect an external device.
⑯Telephone Line Jack
Connect the external telephone cable.
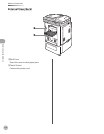
⑰Paper Drawer
Holds up t
o 250 sheets of paper (20 lb (75 g/m
2
)).
⑱Optional Cassette Feeding Unit-AC1
Holds the additional paper supply. Up to 500
sheets of paper (20
lb (75 g/m
2
)) can be held.


