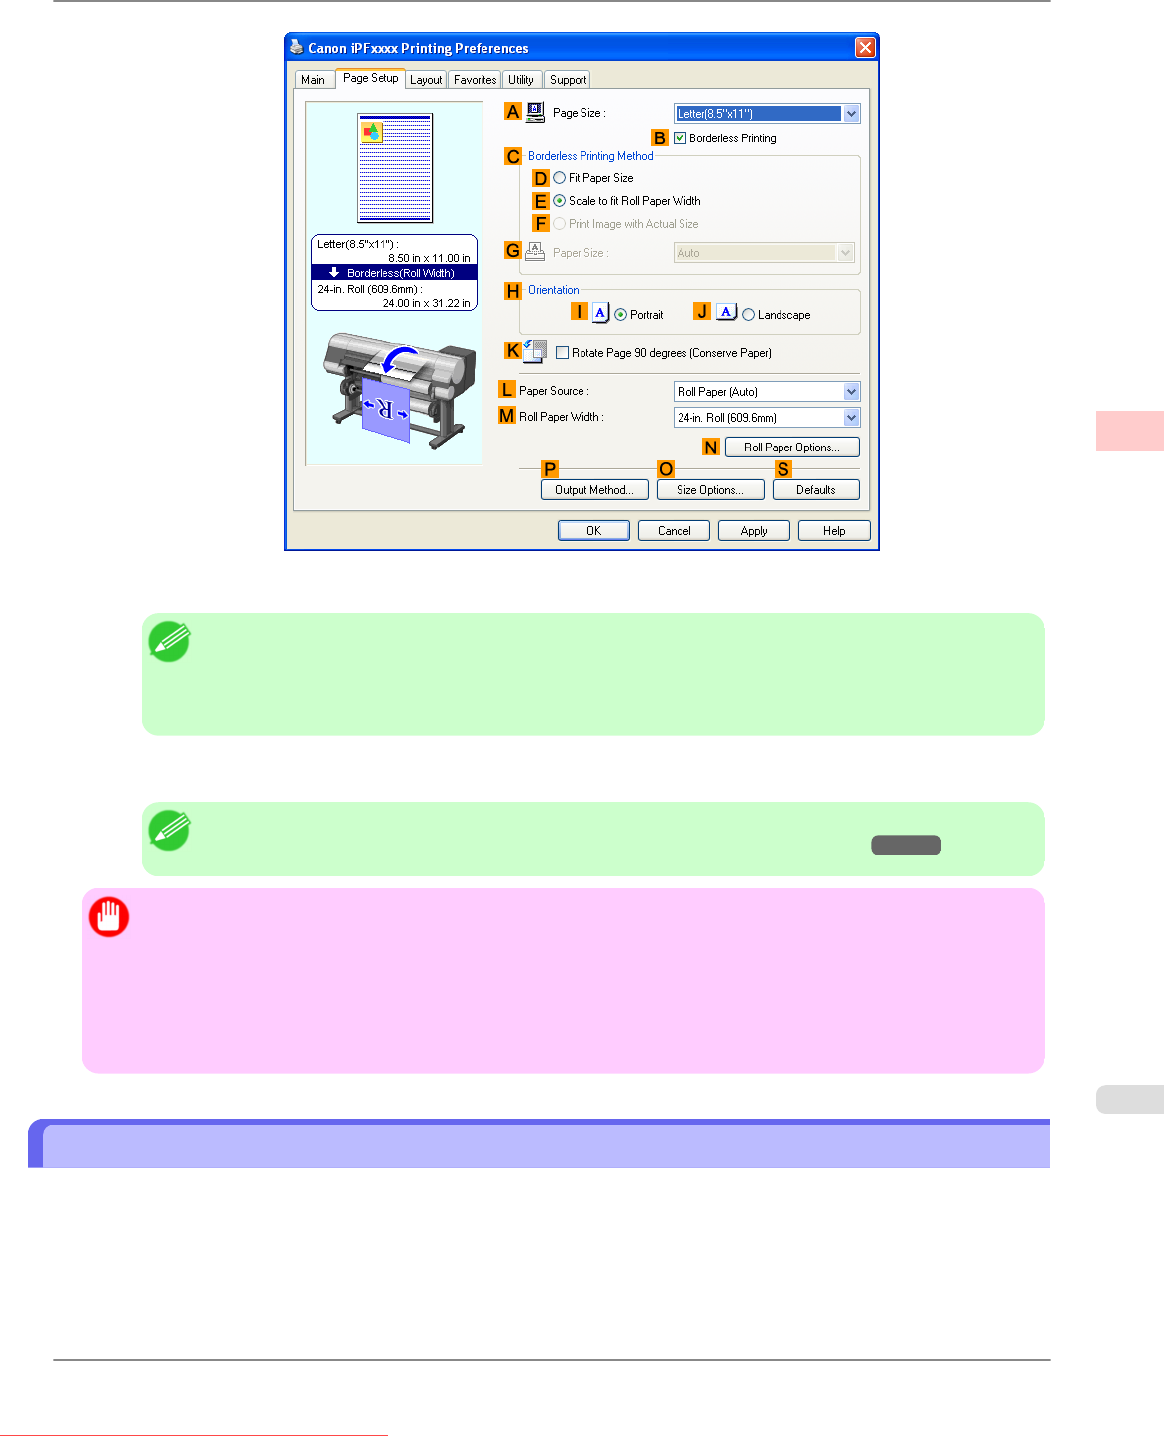
10. Click EFit Roll Paper Width.
Note
• After you click E Fit Roll Paper Width, the Information dialog box is displayed. Select the width
of the loaded roll in the Roll Paper Width list and click OK.
• Make sure the roll paper width you specify matches the width of the loaded roll.
11. Confirm the print settings and print as desired.
Note
• For tips on confirming print settings, see "Confirming Print Settings (Windows)
→P.211 "
Important
• When
the following three settings are configured simultaneously, printing is always performed from roll 1
(the upper roll).
• Automatically switch paper sources (paper size priority) is enabled on the Device Settings sheet.
• Fit Roll Paper Width is selected in Enlarged/Reduced Printing.
• Roll Paper (Auto) is selected in Paper Source.
Resizing Originals to Fit the Roll Width (Mac OS X)
This topic describes how to enlarge originals before printing to match the roll width, based on the following example.
• Document: Any Type
• Page size: A4 (210.0 × 297.0 mm [8.3 × 11.7 in])
• Paper: Roll paper
• Paper type: Plain Paper
Enhanced Printing Options
>
Printing enlargements or reductions
>
iPF825 Resizing Originals to Fit the Roll Width (Mac OS X)
3
75
Downloaded from ManualsPrinter.com Manuals
