


32 Installing the PowerConnect 3324/3348 Switch
www.dell.com | support.dell.com
6 Inspect the product for damage. Report any damage immediately. For information
about contacting Dell, see "Getting Help".
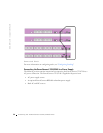
Device Rack Installation
CAUTION: Disconnect all cables from the unit before mounting the
PowerConnect 3324/3348 switch in a rack or cabinet.
Installing PowerConnect 3324/3348:
1 Ground yourself by putting on an ESD wrist strap and attaching the ESD clip to a
metal surface.
2 Place the PowerConnect 3324/3348 switch on a flat and stable surface.
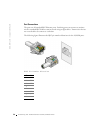
3 Place the supplied rack-mounting bracket on one side of the PowerConnect
3324/3348. Ensure that the mounting holes on the PowerConnect 3324/3348 line up
with the mounting holes on the rack-mounting bracket.
4 Insert the supplied screws into the rack-mounting holes and tighten with a Phillips
screwdriver.
5 Repeat the process for the rack-mounting bracket on the other side of
PowerConnect 3324/3348.
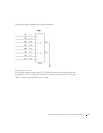
6 Insert the unit into the 19-inch rack and secure the unit to the rack with the rack
screws (not provided by the PowerConnect 3324/3348 supplier). When securing,
fasten the lower pair of screws before the upper pair of screws to ensure that the weight
of the unit is evenly distributed during installation. Ensure that the ventilation holes
are not obstructed.
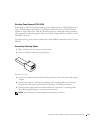
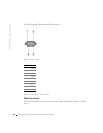
Installing the Switch without a Rack
The PowerConnect 3324/3348 must be installed on a flat surface if it is not installed on a
rack. The surface must be able to support the weight of the device and the device cables.
1 Set PowerConnect 3324/3348 on a flat surface, leaving 2 inches on each side and
5 inches at the back.
2 Ensure that the device has proper ventilation.
3 Attach the rubber feet to the bottom of the device to prevent the device from slipping.