


5-17
MPX Plus 866 A Media Presentation Matrix Switcher • Switcher Software
PRELIMINARY
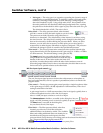
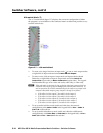
Soft limits ( ) are adjustable, letting you set the ceiling and floor for the group.
Groupedfadersmovetogetheratrelativelevelstothetoporbottomoftheirtravel.
If one fader reaches the limit of its travel first, it retains that position while the other
faders continue to travel. When the grouped faders travel in the reverse direction,
the fader that was at its limit reverts to its position relative to the other faders. No
gain block’s level fader can be set beyond the group fader’s upper or lower limits,
either the hard limits or the soft limits. Any gain fader in the group can be set to a
level below the group fader.
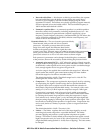
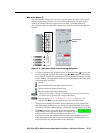
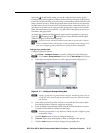
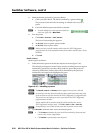
An icon in the gain control indicates that a gain control is assigned to a group; in
figure 5-9,
indicates group 2. in the output 3 control indicates that that gain
control is assigned to more than one group.
N
If a block is muted, that block remains muted when the group mute is released.
T
Extron recommends that if you include a control in multiple groups, that you do so
with care; overlapping group membership can quickly become unmanageable.
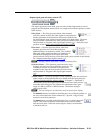
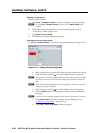
Conguring a group master
Configure a group as follows:
1
. Click Tools > Configure GroupstoopentheCongureGroupsdialogbox.
N
Or, click View > Group Controls and then click the Add a Group menu selection.
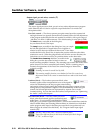
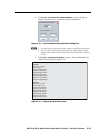
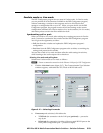
2
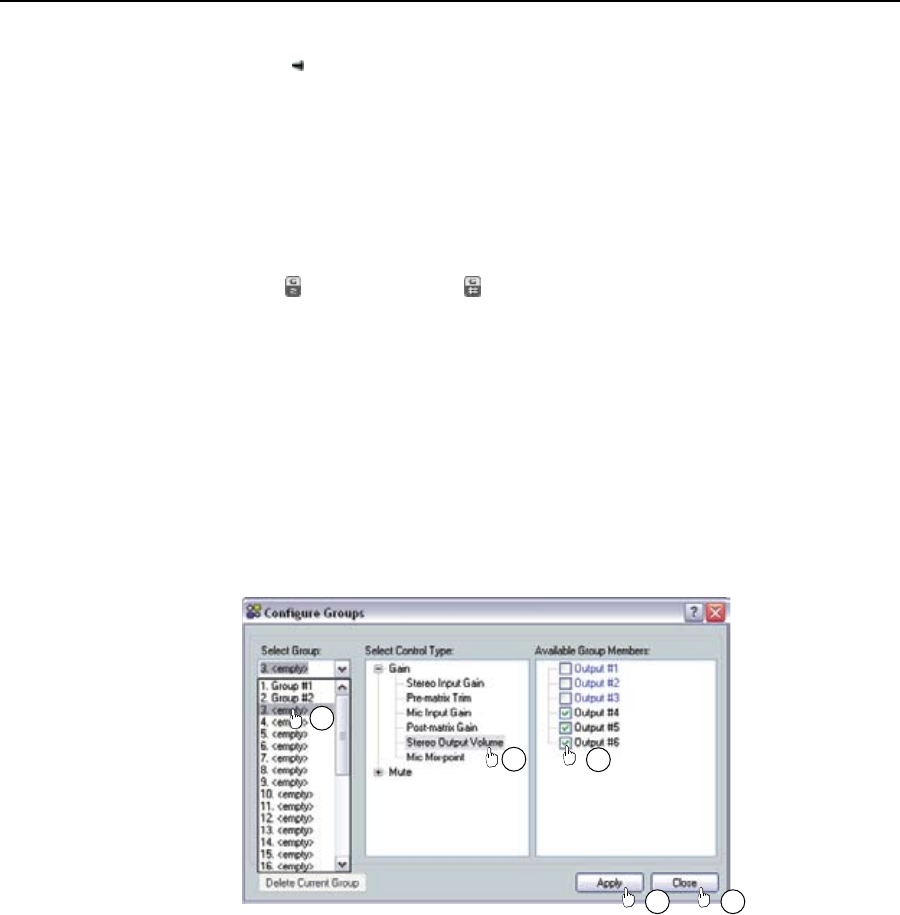
. IntheSelectGroupdrop-downbox,clickagrouptoselectit(gure5-11).
2
3
4
5 7
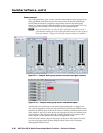
Figure 5-11 — Configure Groups dialog box
N
<empty> groups have no group members assigned. Numbered groups (such as
“Group #1“) have controls assigned that may be overwritten if you select them
and continue.
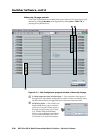
3
. In the Select Control Type field, click the +toexpandtheGainand/orMute
tree and then select a control to assign it to the group.
4
. IntheAvailableGroupMemberseld,clickthedesiredcheckboxestoselect
or deselect those blocks as members of the group.
N
Potential group members in step 4 that are already assigned to a different group
are displayed in blue.
5
. Click the Apply button to create or configure the group.
6
. If desired, repeat steps 2 through 5 to create or configure other groups.
7
. Click the ClosebuttontoexittheCongureGroupsdialogbox.