196
Chapter 10 Unix Host Configuration
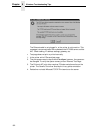
3. At the Network Configuration HTML form that displays, click in the first
field below the “Gateway” heading and type in the IP address of the
default router/gateway for the NIC subnet.
4. Click on the SUBMIT button when done and physically repower the print
server to make sure the new setting is in effect.
Unix Host Configuration
There may be times when you would prefer to or have to perform the manual
setup steps for a new printer definition. There may also be times when you
require a less common print solution such as direct socket capabilities. This
section covers these additional setups.
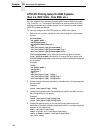
Printing Setup On HP-UX
Method 1, SAM
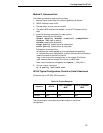
A simple way to set up printing on HP-UX is using SAM, the system
administration tool.
1. At the command prompt in a terminal session, start SAM.
2. Double click on “Printers/Plotters.”
3. Under “Actions,” choose “Add Remote Printer.”
4. In the entry panel that opens, make the following entries (remember Unix
is case sensitive, so d1prn is not the same as D1PRN):
a. For Printer Name, enter anything you want. This is actually the Unix
Queue name, for example, “Accounting.”
b. For Remote System Name, enter the DNS/pingable name, for
example, “MyP5000LJ.”
c. For Remote Printer Name, enter a dest on the P5000LJ, for example,
“d1prn.”
d. Accept defaults for Remote Cancel model and Remote Status model.
e. Check the box next to “Remote Printer is on a BSD system.”
f. Click on OK.
5. You will be asked if you want to add the new printer to HP Vue, this is
optional. Other optional choices include making this the system printer
and allowing anyone to cancel a job.
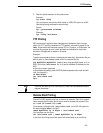
6. Test your new printer by either a command line print:
lp -d Accounting /etc/inetd.conf
or, via an application which can be directed to a selected printer.
Note
If prompted for a User ID and password first, type in
root
for the ID and
press ENTER at the password prompt since there is no default password.


