68
Chapter 3 Configuring NIC
Configuration Using The Printer Control Panel
NIC settings can be set from the printer control panel. The procedure is
described below.
You can set any of three listed parameters from the printer control panel.
These parameters are located in the ETHERNET PARAMS menu. The
available parameters are:
• IP Address
• Gateway Address
• Subnet Mask
The procedure for changing any of the parameters is the same. The
procedure for changing the IP Address is given here as an example. Use the
same procedure for the other required parameters.
To change the IP Address parameter:
1. Make sure the printer is on and raise the printer cover.
2. Press the ON LINE key to place the printer in the OFFLINE mode.
3. Unlock the ENTER key. (For instructions, refer to “Locking And Unlocking
The ENTER Key” on page 48.)
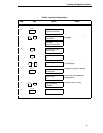
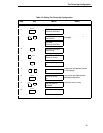
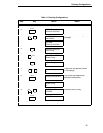
4. Press the LEFT or RIGHT arrow key until the LCD displays “ETHERNET
PARAMS.”
5. Press the DOWN arrow key to access the “IP Address” parameter.
6. Press the DOWN arrow key to view the current IP Address.
7. Press the DOWN arrow key to access the portion of the IP Address to be
changed.
8. Press the LEFT or RIGHT arrow key to select the portion of the IP
Address to be changed.
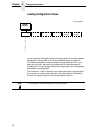
Note Some network environments do not require any network settings to be
configured on the NIC. However, all network setups require configuration
on the host end.
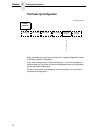
Note When the printer is first powered on, the messages “Waiting for the
Ethernet Adapter” and “Ethernet Detected” will display on the LCD. After
several other boot messages appear, the LCD will display the message
“E-NET INIT.” This initialization process will take about two minutes.
During that time, you will not be able to change any printer settings from
the control panel. If you attempt to do so, the message “Please Wait
E-NET INIT.” will appear. When the initialization is complete, the message
“E-NET READY” will display, and you may then change any NIC or other
printer configuration options from the control panel.


