


Section 8: Adjustment Procedures
M84Pro Service Manual PN 9001111A Page 8-8
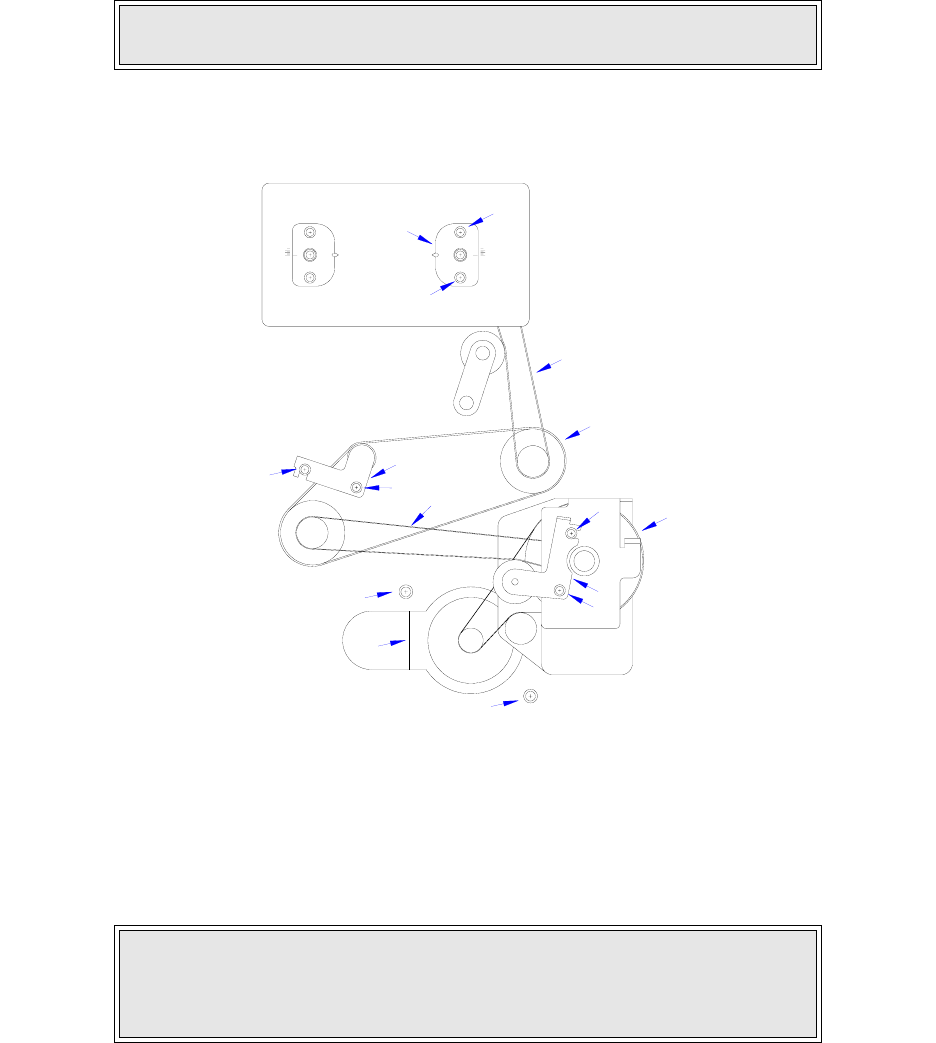
TIMING BELT ADJUSTMENT
The following procedure covers the adjustment of all timing belts within the printer. Not included,
is the adjustment procedure for the optional cutter assembly. However, the adjustment technique
is exactly the same as here. Remove the cutter assembly to gain access to its belts.
1 Switch the printer off and disconnect the power supply cord.
2 Open/remove the top, right, and left housing covers.
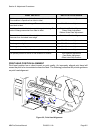
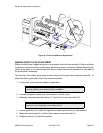
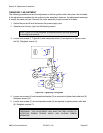
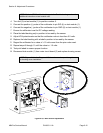
3 Loosen two screws (1, Figure 8-6) and manipulate motor (2) as required to tighten motor
belt (3). Retighten screws (1).
Figure 8-6, Tightening Timing Belts
4 Loosen two screws (4) and manipulate bracket (5) as required to tighten feed roller belt (6).
Retighten screws (4).
5 Loosen two screws (7) and manipulate bracket (8) as required to tighten platen roller belt
(9). Retighten screws (7).
NOTE: Figure 10-1 of the Diagrams & Schematics section provides guidance
on housing cover removal.
CAUTION: STEP 6 SHOULD ONLY BE PERFORMED BY FACTORY
PERSONNEL. THIS ADJUSTMENT MAY MAKE MATTERS WORSE BY
AFFECTING RIBBON REWIND ANGLE AND CAUSING RIBBON
WRINKLING.
11
10
12
8
7
7
1
1
3
9
6
4
5
4
2
10