


Section 8: Adjustment Procedures
M84Pro Service Manual PN: 9001111A Page 8-9
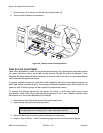
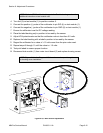
6 Loosen two screws (10) and manipulate bracket (11) to tighten ribbon rewind belt (12).
Retighten screws (10).
7 Restore power and test cycle to ensure proper function.
8 Close/replace housing covers.
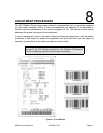
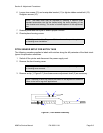
PITCH SENSOR SETUP FOR NOTCH TAGS
The following procedure applies to labels with notches along the left perimeter of the label stock.
Ignore this procedure otherwise.
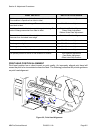
1 Switch off the printer and disconnect the power supply cord.
2 Remove the front housing cover.
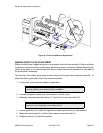
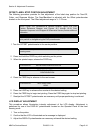
3 Remove e-clip (1, Figure 8-7) from brass sensor adjustment shaft (2) as necessary.
Figure 8-7, Pitch Sensor Assembly
NOTE: The lower roller may be adjusted by inserting a medium sized
standard screwdriver into the slot located along the lower periphery of the
roller bracket and twisting. The scale is located adjacent to the adjustment
slot.
NOTE: Figure 10-1 of the Diagrams & Schematics section provides guidance
on housing cover installation.
NOTE: Figure 10-1 in the Diagrams & Schematics section provides guidance
on housing cover removal.
NOTE: Removal of the e-clip permits the sensor to be adjusted an additional
14mm to the left for tag stock applications.
2
4
3
1