


Section 7: Replacement Procedures
M84Pro Service Manual PN 9001111A Page 7-18
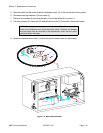
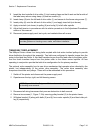
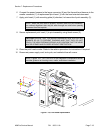
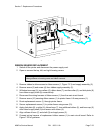
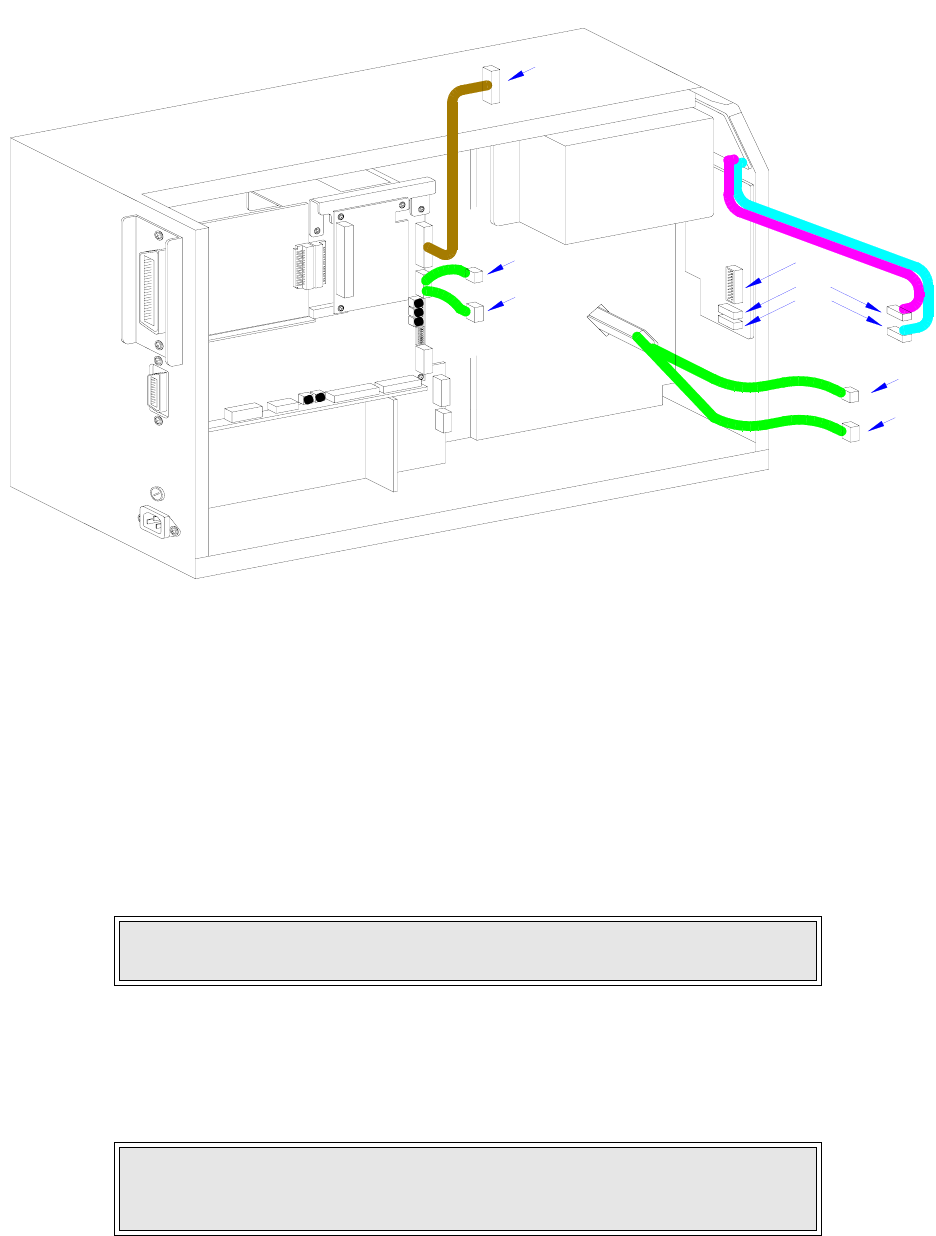
Figure 7-13, Wiring Harness Connection
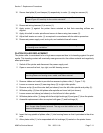
PRINT HEAD REPLACEMENT
If the print head becomes damaged or wears out, it can be easily removed and replaced without
having to make critical adjustments. Before replacing the print head, check the head counter
values by printing a test pattern.
1 Switch off the printer and disconnect the power supply cord.
2 Open/remove the top, right, and front housing covers.
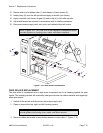
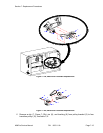
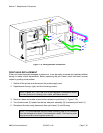
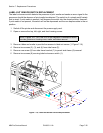
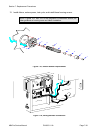
3 Remove ribbon and media to provide free access to print head (1, Figure 7-14).
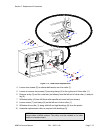
4 Turn thumb screw (2) located on the top side print assembly (3) to release print head (1).
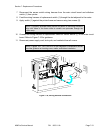
5 Disconnect the two wiring harnesses from print head (1) and lift away.
NOTE: Figures 10-1, 10-2, and 10-3 of the Daigrams & Schematics section
provides guidance on housing cover, media, and ribbon removal.
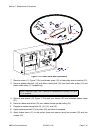
NOTE: It is recommended that print head mounting plate (4) be removed
from the damaged print head (1) and saved as a spare. The mounting plate
may be removed by removing two screws (5).
IN
T
E
R
F
A
C
E
M
A
IN
C
IR
C
U
I
T
B
O
A
R
D
D
A
U
G
H
T
E
R
B
O
A
R
D
P
O
W
E
R
B
O
A
R
D
B
O
A
R
D
B
E
L
T
C
O
N
F
I
G
U
R
A
T
I
O
N
B
E
L
T
C
O
N
F
I
G
U
R
A
T
I
O
N
B
E
L
T
C
O
N
F
I
G
U
R
A
T
I
O
N
B
E
L
T
C
O
N
F
I
G
U
R
A
T
I
O
N
P
A
N
E
L
B
O
A
R
D
L
C
D
B
A
C
A
D
E
D
E