Section 5 Other Features of this Fax
5-29
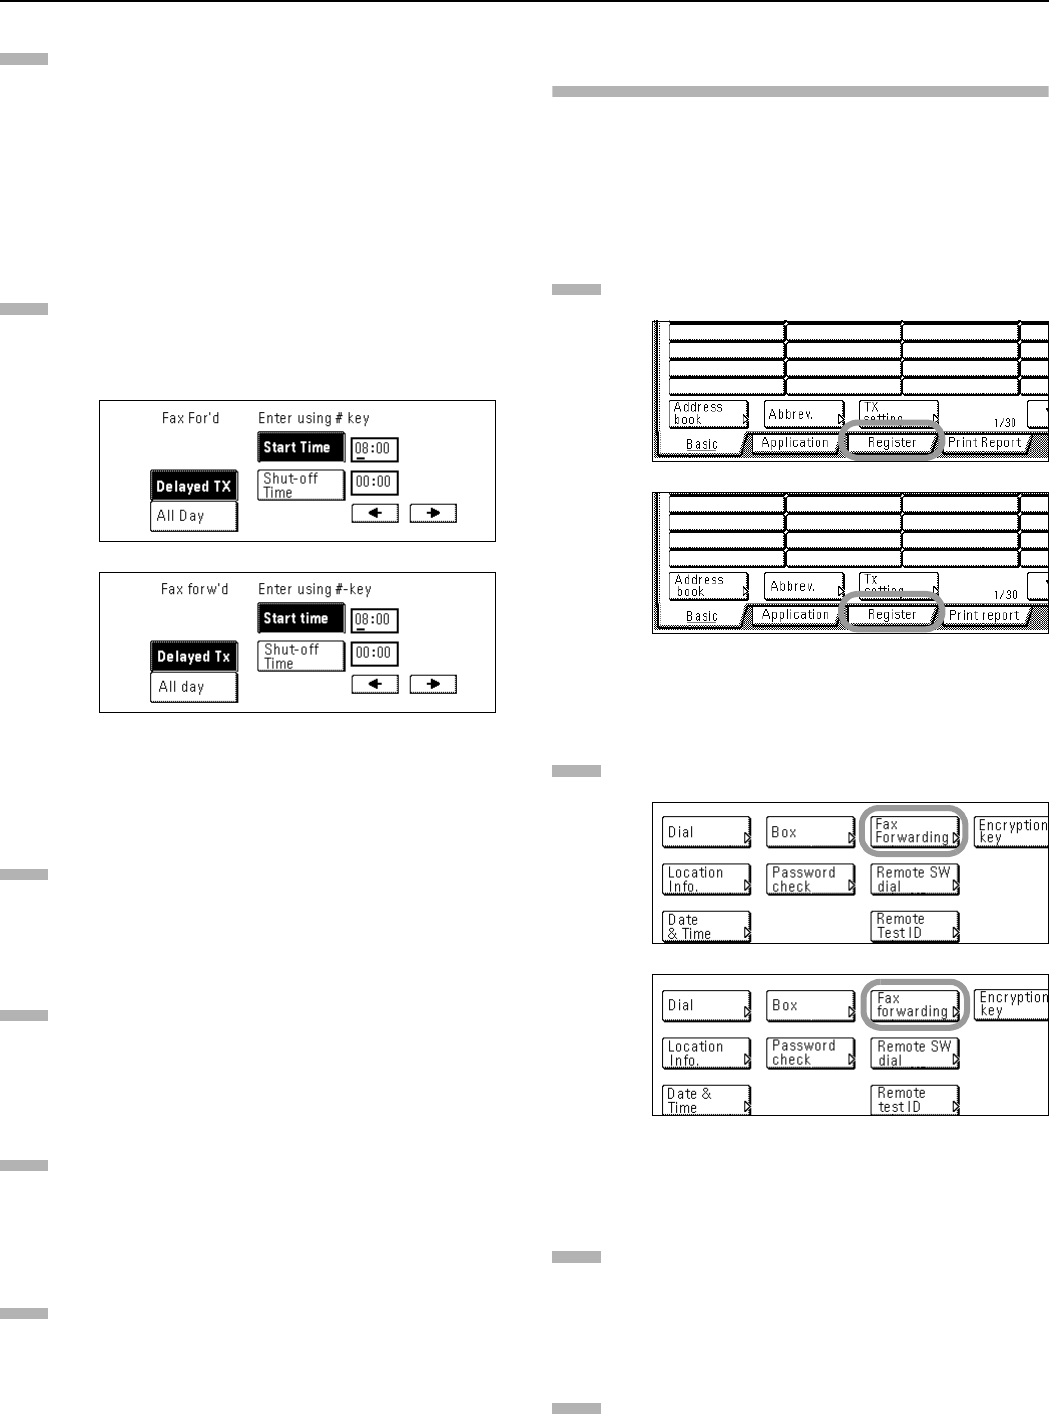
Select whether or not you want to designate a time for the
Fax Forwarding operation to begin and end. To set the
time, press the “Delayed TX” key and go to the next step.
If you do not want to designate a time for the operation to
begin and end, press the “All Day” key and go to step 9. If
you select “All Day”, the Fax Forwarding operation will
continue indefinitely, regardless of the time of the day.
> Designating the time for Fax Forwarding to begin and end
Use the keypad to enter the desired time for Fax
Forwarding to begin.
* If you want to change the entered time, use the “”
and/or “” keys to move the cursor to the desired
location.
(inch)
(metric)
Press the “Shut-off Time” key and use the keypad to enter
the desired time for Fax Forwarding to end.
Press the “Next” key. The currently registered
information will be displayed.
Check that information and press the key that
corresponds to any item that you want to modify.
Press the “OK” key.
The message display will return to the same screen as
was displayed in step 2. If you are finished making
settings, press the Reset key.
Modifying Registered Fax Forwarding
Information
Perform the following procedure in order to modify information
already registered for Fax Forwarding.
* If you want to cancel the procedure part way through, press the
Reset key. The touch panel will return to the initial mode
settings.
Press the “Register” key. The Registration Select screen
will appear.
(inch)
(metric)
Press the “Fax Forwarding” key. The currently registered
information will be displayed.
(inch)
(metric)
Check that information and press the key that
corresponds to any item that you want to modify. Refer to
“Registering the Fax Forwarding Information” on page
5-28 in order to modify that information.
Once you are finished modifying information, press the
“OK” key.
The message display will return to the same screen as
was displayed in step 2. If you are finished making
settings, press the Reset key.
6
7
8
9
10
11
1
2
3
4


