Installing System Components 119
6
If you are not replacing the RAC card, disconnect and remove the ribbon
cables from the system board.
NOTICE: When detaching the RAC cables from the system board, squeeze the
metal ends of the cable connectors and gently work the connector out of the
socket. Do not pull on the cable to unseat the connector. Doing so can damage the
cable.
7
Install the expansion card shroud. See "Installing the Expansion Card
Shroud" on page 75.
8
Close the system. See "Closing the System" on page 70.
9
Place the system upright and on its feet on a flat, stable surface.
10
Reattach any peripherals, then connect the system to the electrical outlet.
11
Turn on the system and attached peripherals.
Installing a RAC Card
CAUTION: Only trained service technicians are authorized to remove the system
cover and access any of the components inside the system. See your Product
Information Guide for complete information about safety precautions, working
inside the system, and protecting against electrostatic discharge.
1
Turn off the system, including any attached peripherals, and disconnect
the system from the electrical outlet.
2
Open the system. See "Opening the System" on page 68.
3
Remove the expansion card shroud. See "Removing the Expansion Card
Shroud" on page 72.
4
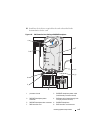
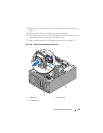
Install the RAC card in expansion slot 1. See "Installing an Expansion
Card" on page 110 for information on installing the card. See
Figure 6-1
for the expansion slot location.
5
Connect the two short ribbon cables to the system board and then to the
RAC card. See
Figure 6-1
for the connector locations.
NOTICE: Be careful when attaching cables to the system board that you do not
damage the surrounding system board components.
a
Connect one cable to the RAC_CONN1 connector on the system
board and to connector 1 on the RAC card.
b
Connect the second cable to the RAC_CONN2 connector on the
system board and to connector 2 on the RAC card.


