


DFX-8500
Rev. B
3-1
0
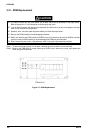
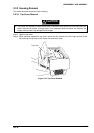
CAUTION
;
When you remove the connector cover, be careful not to break the tabs.
;
When you remove the printhead cable holder, be careful not to break the printhead holder latch. Use
a slotted screwdriver if necessary.
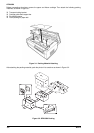
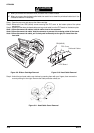
Step 1: Open the top cover and remove the ribbon cartridge.
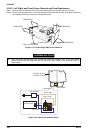
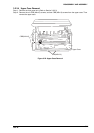
Step 2: Remove the two CBS (M3x8) screws securing the FPC cover to the bottom plate of the printer
mechanism.
Step 3: Disconnect the three printhead cables and a ground cable from the FPC board on the bottom plate.
Note 1. When disconnect the cables, hold the cable close to the connector.
Note 2. When disconnect the cable, hold the connector to prevent it from being pulled off the board.
Note 3. When disconnect the cable, pull it slowly and horizontally to the right, as viewed from the
front side.
CBS(M 3X8)
FPC Cover
Printhead C ables
FPC Board
Figure 3-9. Ribbon Cartridge Removal Figure 3-10. Head Cable Removal
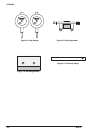
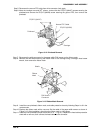
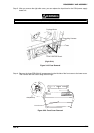
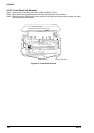
Step 4: Unlock the two head cable cover latches by pressing them with your fingers, then remove the
cover by sliding it to the right. Remove the cable protection sheet, too.
Figure 3-11. Head Cable Cover Removal