


DFX-8500
Rev. B
3-4
4
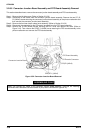
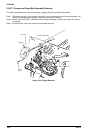
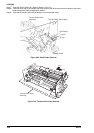
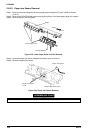
3.2.6.11 Paper Jam Sensor Removal
Step 1: Remove the platen along with the lower paper guide composed of 3 parts. (Refer to Section
3.2.6.10.)
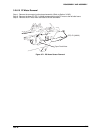
Step 2: Remove the CPN(SP)(M4x8) screw securing the left part of the lower paper guide to the platen.
Step 3: Remove the part from the platen.
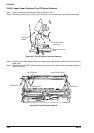
L o w e r P a p e r G u id e
CPN(SP)(M4X8)
Platen
Right
Left
Figure 3-64. Lower Paper Guide Left Part Removal
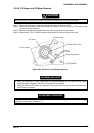
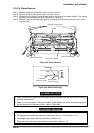
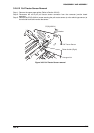
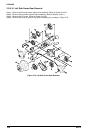
Step 4: Unhook the paper jam sensor (magnetic transistor) cover to remove it.
Step 5: Remove the paper jam sensor.
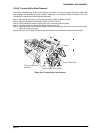
Paper Jam Sensor
Paper Jam Sensor
Cover
L o w e r P a p e r G u id e (L e ft)
Figure 3-65. Paper Jam Sensor Removal
ASSEMBLING POINT
When you attach the paper jam sensor, make sure it is oriented correctly (front to back).