


DISASSEMBLY AND ASSEMBLY
Rev. B
3-1
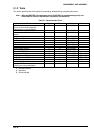
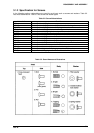
3.1 OVERVIEW
This chapter describes the disassembly/assembly procedures to be used for replacing the main
assemblies of the DFX-8500.
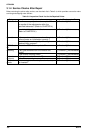
3.1.1 Precautions for Disassembly and Assembly
Read this section before you disassemble, assemble, or transport the printer.
;
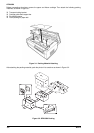
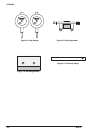
Because the DFX-8500 weighs 29.0 kg (63.8 lb) and is much larger and heavier than most printers,
you must be careful when handling it. Whenever it needs to be moved, two or more persons must
carry it, supporting it from the bottom. Never lift the printer by holding the front cover, because it may
come off.
;
Disconnect the power cord before disassembling or assembling the printer.
;
Disconnect the interface cable before disassembling or assembling the printer.
;
The printhead reaches very high temperatures, and if you place your hand on it, it could burn you.
Always be sure that the printhead is cool coot when you handle it.
;
Wear gloves to protect your hands when handling the printer.
;
Handle frame edges with care since this printer has a considerable amount of metal materials.
;
To prevent damage to ICs from static electricity, do not touch the ICs on the circuit board or the
terminals of peripheral electrical components with your hands.
;
Use only the recommended tools to ensure safe and efficient maintenance work. Inappropriate
tools may damage the printer.
;
This printer must be properly packed in the correct container for transportation as described on
next page. If the unit is not properly packed, it could be damaged during transportation.
;
The paper and ribbon cartridge should be removed before transportation or disassembly.
;
Because you may need to turn the printer while you disassemble or assemble it, place it on a clean,
thick cloth, such as a blanket, before starting
;
After finishing the assembly, do not forget to lubricate and reassemble the unit following the
instructions in CHAPTER 6, because a considerable amount of oil may be removed during
maintenance or repair work. Also, be sure to clean the unit as described in CHAPTER 6.
WARNING
CAUTION