


DFX-8500
Rev. B
3-5
4
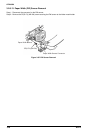
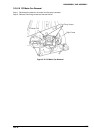
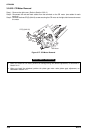
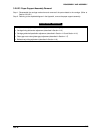
3.2.6.20 CR Motor Removal
Step 1: Remove the right cover. (Refer to Section 3.2.3.2.)
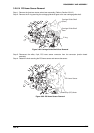
Step 2: Disconnect the red and black cables from the terminals on the CR motor. (two cables for each
terminal)
Step 3: Remove the three CP(S) (M4x10) screws securing the CR motor to the right side frame and remove
the motor.
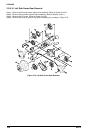
C P(S)(M 4X10)
CR Motor
Figure 3-77. CR Motor Removal
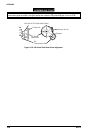
ADJUSTMENT REQUIRED
• When you install the CR motor, perform the carriage timing belt tension adjustment, as described in
Section 4.1.2.
• When you install the printhead, perform the platen gap motor value (platen gap) adjustment, as
described in Section 4.1.7.