


DFX-8500
Rev. B
3-3
0
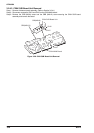
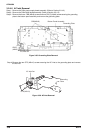
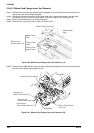
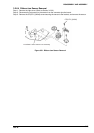
Step 5: Remove the four screws securing the printer mechanism to the lower case.
Screws
Screws
Figure 3-43. Printer Mechanism Removal 1/2
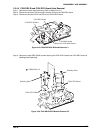
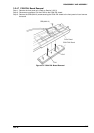
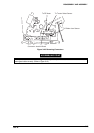
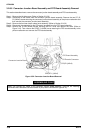
Step 6: Install the lift handles from the inside of the printer mechanism. Insert each handle through the
two holes in the side frames of the printer mechanism. Then slowly lift up the printer mechanism
using the handles and remove it from the lower case.
Lift Handle #E656
P rin te r M e c h a n is m
Low er Housing Assem bly
Figure 3-44. Printer Mechanism Removal 2/2
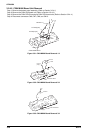
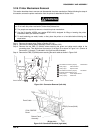
ASSEMBLING POINT
When you install the printer mechanism, route the cables as shown in Figures 3-41 and 3-42. Make sure
the cables do not get caught between the printer mechanism and lower case.
ADJUSTMENT REQUIRED
When you install the printer mechanism, perform the following adjustments:
Platen gap motor value (platen gap) adjustment (described in Section 4.1.7)
Bidirectional printing adjustment (described in Section 4.1.8)