


6. Remove the cables that connect to all external devices. For instructions, see
“Replacing Connections to Routing Engine Interface Ports” on page 104.
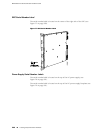
7. Remove all field replaceable units (FRUs) from the router.
8. Remove the router from the rack:
■ If you are using a mechanical lift, place the lift platform under the router,
unscrew and remove the mounting screws from the rack, and move the
router to the shipping crate.
■ If you are not using a mechanical lift and the router weight is fully supported
by a shelf or another router, unscrew and remove the mounting screws from
the rack. Three people can then lift the router and move it to the shipping
crate.
■ If you are not using a mechanical lift and the router weight is not fully
supported by a shelf or another router, two people should grasp the router
while a third person unscrews and removes the mounting screws from the
rack. The three lifters can then move the router to the shipping container.
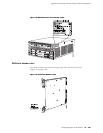
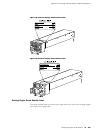
9. Place the router in the shipping crate or onto the pallet. If on a pallet, bolt the
router to the pallet.
10. Cover the router with an ESD bag and place the packing foam on top of and
around the router.
11. Replace the accessory box on top of the packing foam.
12. Securely tape the box closed or place the crate cover over the router.
13. Write the RMA number on the exterior of the box to ensure proper tracking.
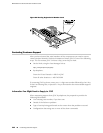
Packing Components for Shipment
To pack and ship individual components, follow these guidelines:
■ When you return components, make sure they are adequately protected with
packing materials and packed so that the pieces are prevented from moving
around inside the carton.
■ Use the original shipping materials if they are available.
■ Place individual boards in electrostatic bags.
■ Write the RMA number on the exterior of the box to ensure proper tracking.
CAUTION: Do not stack any of the router components.
Packing Components for Shipment ■ 205
Appendix H: Contacting Customer Support and Returning Hardware