


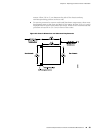


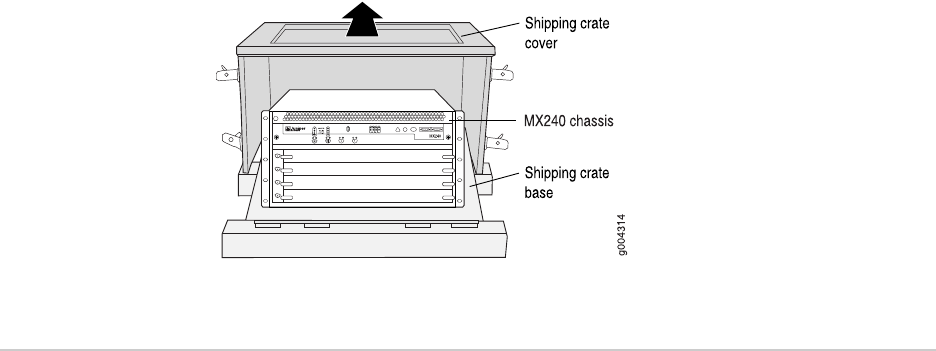
To unpack the router (see Figure 22 on page 38):
1. Move the shipping crate to a staging area as close to the installation site as
possible, where you have enough room to remove the components from the
chassis. While the chassis is bolted to the pallet, you can use a forklift or pallet
jack to move it.
2. Position the shipping crate with the arrows pointing up.
3. Open all the latches on the shipping crate.
4. Remove the front door of the shipping crate cover and set it aside.
5. Slide the remainder of the shipping crate cover off the pallet.
6. Remove the foam covering the top of the router.
7. Remove the accessory box and the Quick Start installation instructions.
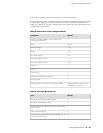
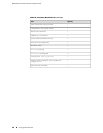
8. Verify the parts received against the lists in Table 20 on page 39 and
Table 21 on page 39.
9. Remove the vapor corrosion inhibitor (VCI) packs attached to the pallet, being
careful not to break the VCI packs open.
10. To remove the brackets holding the chassis on the pallet, use a 1/2-in. socket
wrench and a number 2 Phillips screwdriver to remove the bolts and screws
from the brackets.
11. Store the brackets and bolts inside the accessory box.
12. Save the shipping crate cover, pallet, and packing materials in case you need to
move or ship the router at a later time.
13. To proceed with the installation, see “Installing the Router Using a Lift” on page
46 or “Installing the Router Without a Mechanical Lift” on page 187.
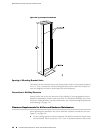
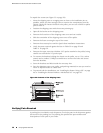
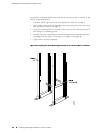
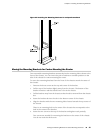
Figure 22: Contents of the Shipping Crate
Verifying Parts Received
A packing list is included in each shipment. Check the parts in the shipment against
the items on the packing list. The packing list specifies the part numbers and
descriptions of each part in your order.
38 ■ Verifying Parts Received
MX240 Ethernet Services Router Hardware Guide