


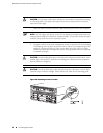

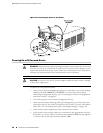
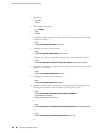
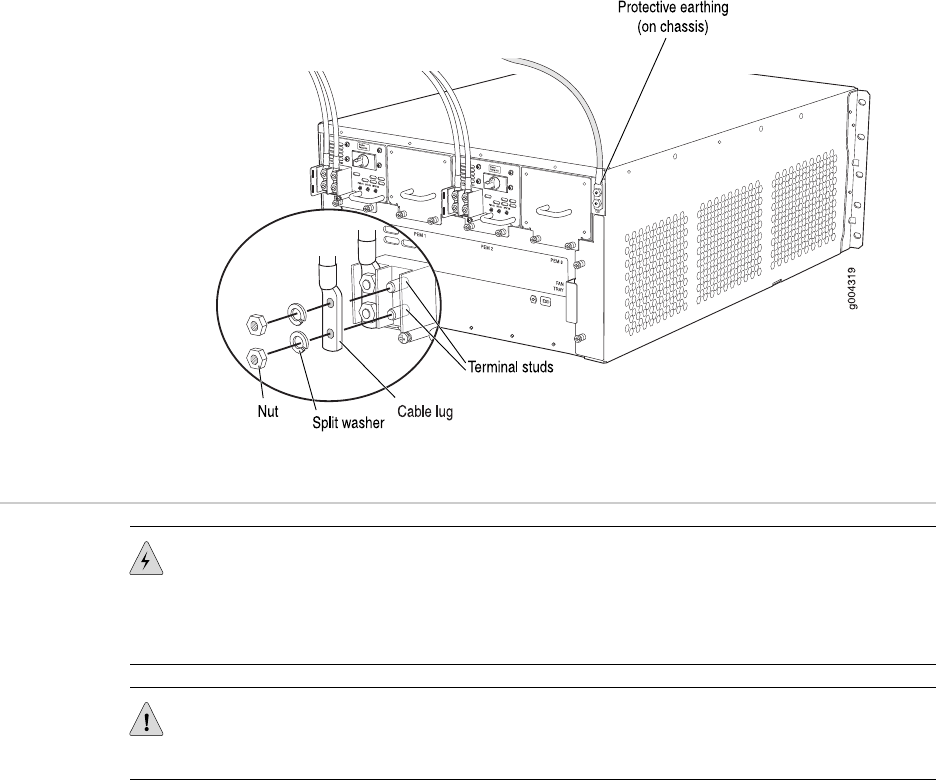
Figure 31: Connecting DC Power to the Router
Powering On a DC-Powered Router
WARNING: Before performing the following procedure, ensure that power is removed
from the DC circuit. To ensure that all power is off, locate the circuit breaker on the
panel board that services the DC circuit, switch the circuit breaker to the off position,
and tape the switch handle of the circuit breaker in the off position.
CAUTION: Do not mix AC and DC power supplies within the same router. Damage
to the router might occur.
To power on a DC-powered router:
1. Verify that an external management device is connected to one of the Routing
Engine ports (AUX, CONSOLE, or ETHERNET). For more information about
connecting management devices, see “Connecting the Router to Management
and Alarm Devices” on page 49.
2. Turn on the power to the external management device.
3. Attach an electrostatic discharge (ESD) grounding strap to your bare wrist and
connect the strap to one of the ESD points on the chassis. For more information
about ESD, see “Preventing Electrostatic Discharge Damage” on page 130.
4. Verify that the power supplies are fully inserted in the chassis.
5. Verify that the source power cables are connected to the appropriate terminal:
the positive (+) source cable to the return terminal (labeled RTN) and the negative
(–) source cable to the input terminal (labeled –48V).
58 ■ Powering On a DC-Powered Router
MX240 Ethernet Services Router Hardware Guide