


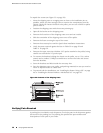

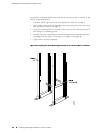

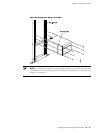

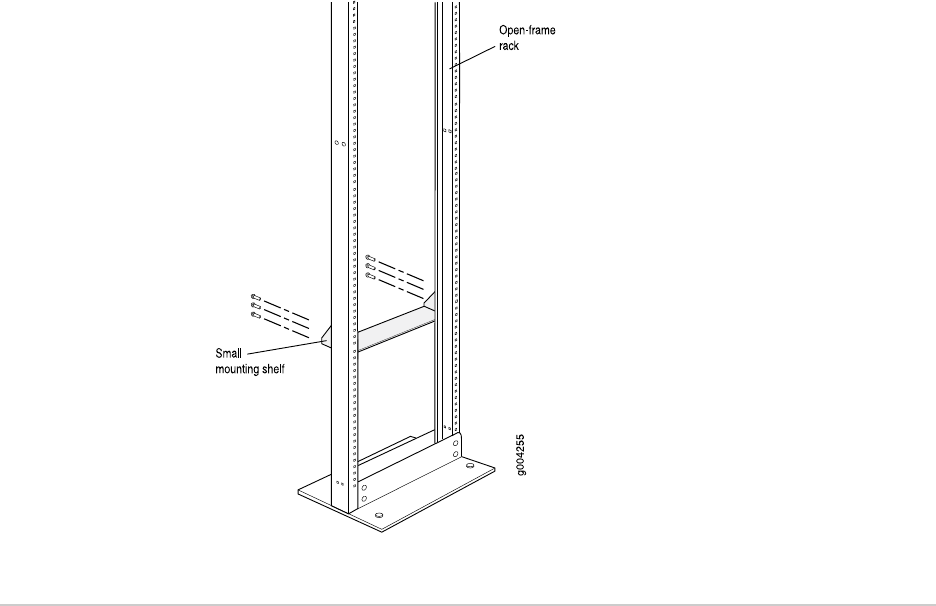
Figure 24: Installing the Mounting Hardware for an Open-Frame Rack
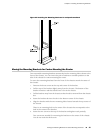
Moving the Mounting Brackets for Center-Mounting the Router
Two removable mounting brackets are attached to the mounting holes closest to the
front of the chassis. You can move the pair of brackets to another position on the
side of the chassis for center-mounting the router.
To move the mounting brackets from the front of the chassis toward the center of
the chassis:
1. Remove the three screws at the top and center of the bracket.
2. Pull the top of the bracket slightly away from the chassis. The bottom of the
bracket contains a tab that inserts into a slot in the chassis.
3. Pull the bracket away from the chassis so that the tab is removed from the chassis
slot.
4. Insert the bracket tab into the slot in the bottom center of the chassis.
5. Align the bracket with the two mounting holes located toward the top center of
the chassis.
There is no mounting hole in the center of the chassis that corresponds to the
hole in the center of the bracket.
6. Insert the two screws at the top of the bracket and tighten each partially.
Two screws are needed for mounting the bracket on the center of the chassis.
You do not need the third screw.
Moving the Mounting Brackets for Center-Mounting the Router ■ 43
Chapter 6: Installing the Mounting Hardware