


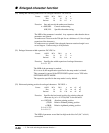


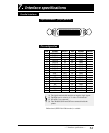
*1) When the head adjustment is not appropriate,
(1) In the AUTO mode:
Specify the appropriate head adjustment again in the range from -2 to +5. When the appropriate
head adjustment cannot be set, carry out this setting in the FIX mode.
(2) In the FIX mode:
Specify the appropriate head adjustment again.
(3) When the appropriate head adjustment cannot be specified, the head adjustment mechanism is
faulty. Have it replaced by the dealer.
6-6
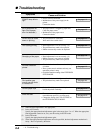
— 6. Troubleshooting —
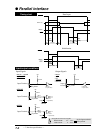
●
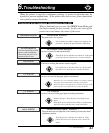
Troubleshooting
Cause and Solution
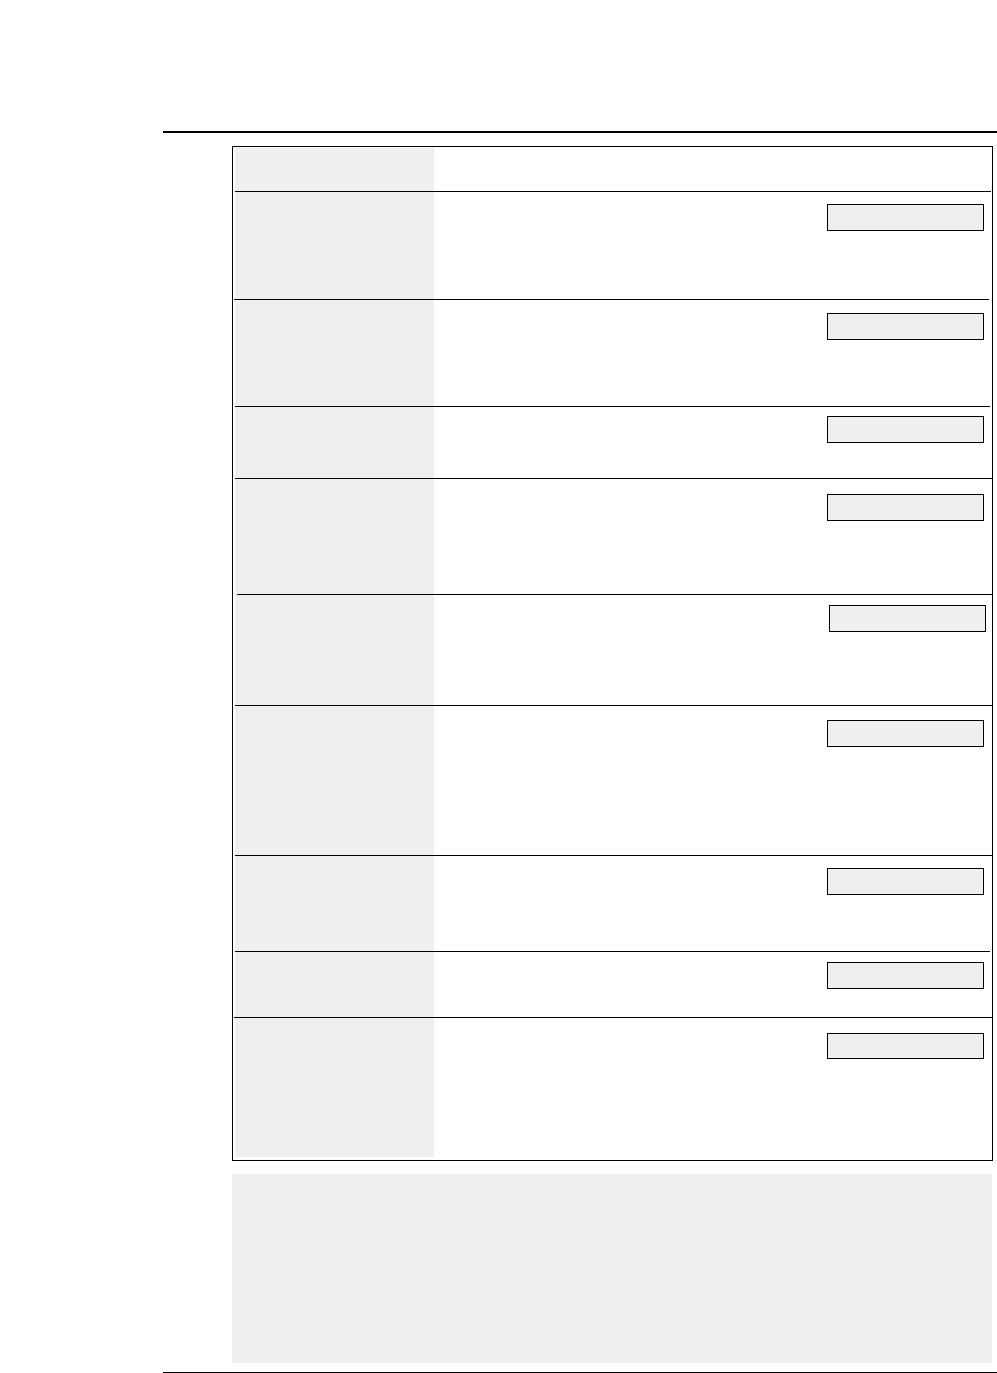
• Power cord not connected.
• Malfunction of the power supply in the
printer
Contact the dealer.
• The paper sensor is clogged by paper dust.
Clean the paper sensor.
• Malfunction of the paper sensor
Contact the dealer.
• The print head has overheated.
Wait until it has cooled down.
• Head adjustment is not set correctly. (*1)
• The print head may need to be replaced.
• Ribbon cassette may need to be replaced.
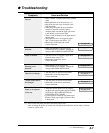
• Head adjustment is not set correctly. (*1)
• Ribbon cassette is not properly installed.
• The print head may need to be replaced.
• Check whether the cable connection is faulty
or broken.
• Host system control and data code may not
match the printer's setup.
• Check the emulation setting of the EXTENDED
SETUP MODE.
• Adjust with the vertical alignment function.
• The print head may need to be replaced.
• Stack of fanfold paper to be fed is placed
beside the printer crookedly.
• The automatic carriage return option in the
extended setup options is set incorrectly.
• Change the setting of #27 CR SETTING on
the EXTENDED SETUP MODE.
Symptoms
POWER lamp fails to
light.
Error lamp does not
light.(Out-of-paper
error not detected.)
Printer stops or slows
down on printing.
Poor quality printing
Smudging of the paper
Incorrect character
printed
Print position gap
occurs over bar code
or vertical line.
Fanfold paper slips
Extra line feed
See page 1-1.
See page 3-9.
See page 6-3.
See page 3-9.
See page 4-6.
See page 1-12.
See page 3-27.
See page 6-3.
See page 1-2.