124
12
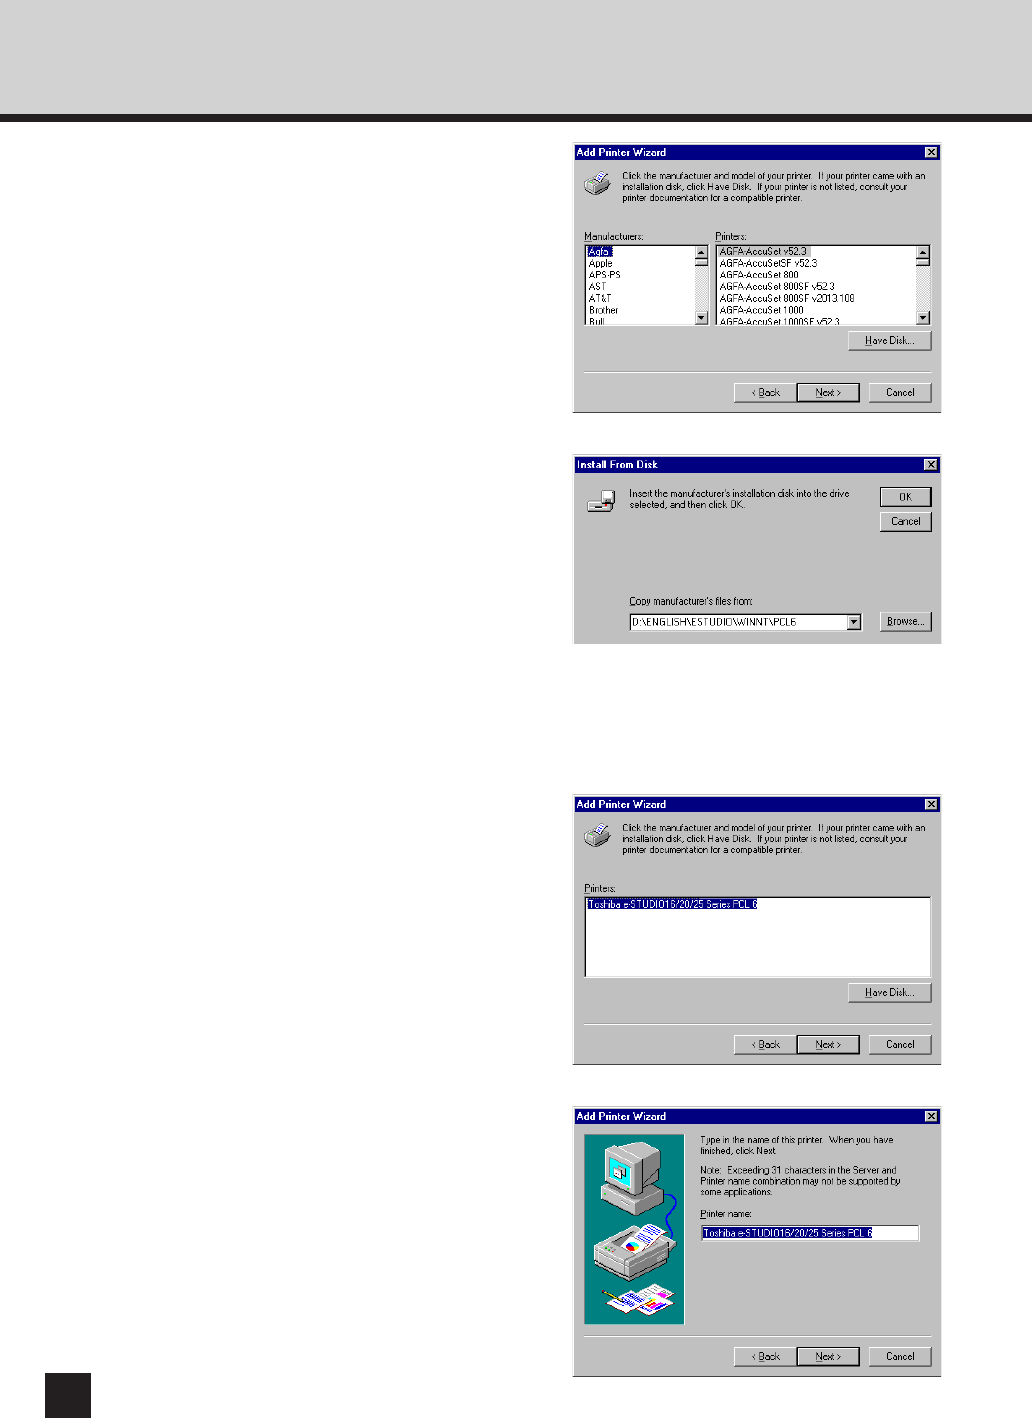
Select the printer to be used, and
click on [Next].
8
Click on [Have Disk...].
● The Install From Disk screen appears.
9
Insert the CD-ROM included with the
Printer kit into the CD-ROM drive.
10
Enter the path to the printer driver
located in the CD-ROM.
● If you want to install the PCL 6 printer driver,
enter “D:\ENGLISH\ESTUDIO\WINNT\PCL6”
(where the CD-ROM driver is the D drive.)
● If you want to install the PS printer driver, enter
“D:\ENGLISH\ESTUDIO\WINNT\PS” (where the
CD-ROM driver is the D drive.)
11
Click on [OK].
13
If necessary, change the Printer
name, then click on [Next].
● If other printer drivers are already installed,
select whether or not this new printer should be
designated as the default printer. If [Yes] is
selected, the printer name will be displayed as
the first printer for printing your applications.


