144
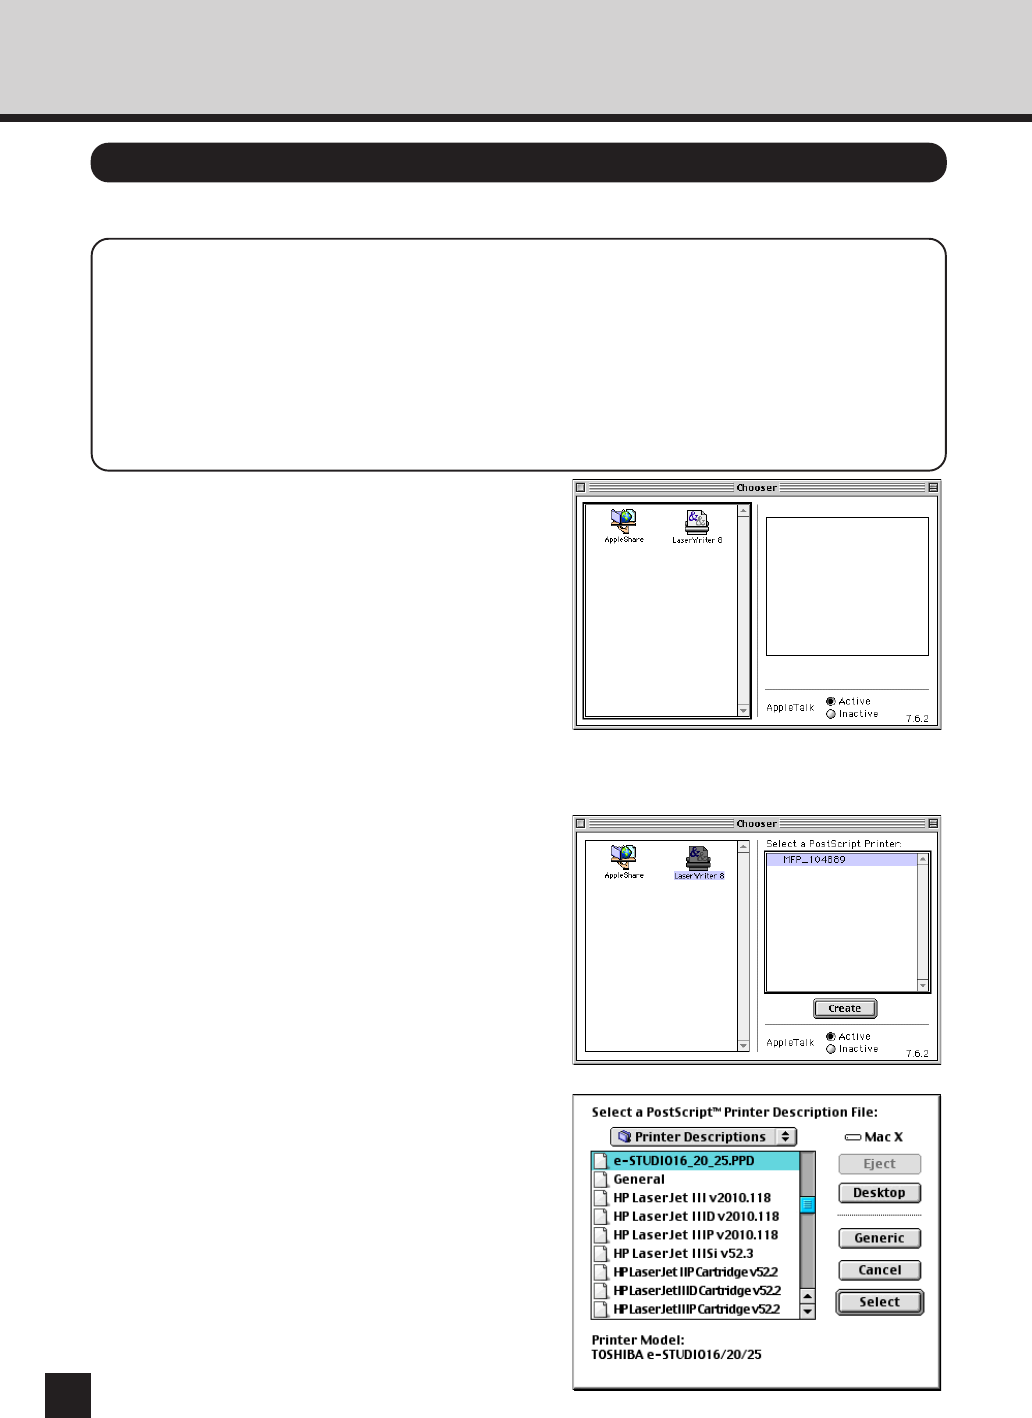
Select the e-STUDIO16/20/25 from the Chooser.
SUPPLEMENTS:
● Your computer must be connected to the network via Ethernet. And “Ethernet” must be
selected for “Connect via” in the AppleTalk SETUP.
● If the network has not been set yet, it should be set in [AppleTalk], [File Sharing], [Users
& Groups], and so on.
● In order to print through AppleTalk, the machine must be set to enable the AppleTalk
protocol. See “NETWORK SETUP - APPLETALK”.
1
Click on the [Apple] menu, and select
[Chooser].
● “Chooser” appears.
2
Make sure that “Active” is selected
for “AppleTalk”.
● If “Inactive” is selected for “AppleTalk”, please
click on “Active”.
● If “Active” is selected for “AppleTalk”, but no
other Macintosh on the network is displayed,
please confirm that the network cable is
connected and set properly.
3
Select a zone that this machine
belongs to from “AppleTalk Zone”.
● This appears only when several zones exist on
the same network.
● Please ask an administrator which zone the
printer is a part of
4
Select “LaserWriter8”.
● The printer list appears in “Select a PostScript
Printer”.
5
Select this machine from the printer
list, and click on [Create].
● “Select a PostScript Printer Description File”
appears.
6
Select “e-STUDIO16_20_25.PPD”, and
click on [Select].
● The printer is created on the desktop.
● If other options are installed on the machine, the
screen in Step 3 at “Option Setup” is displayed.
In this case, continue the operation.
Select the Driver
