15
ASSIGNING
IP ADDRESS
Assigning the IP Address from the Control Panel
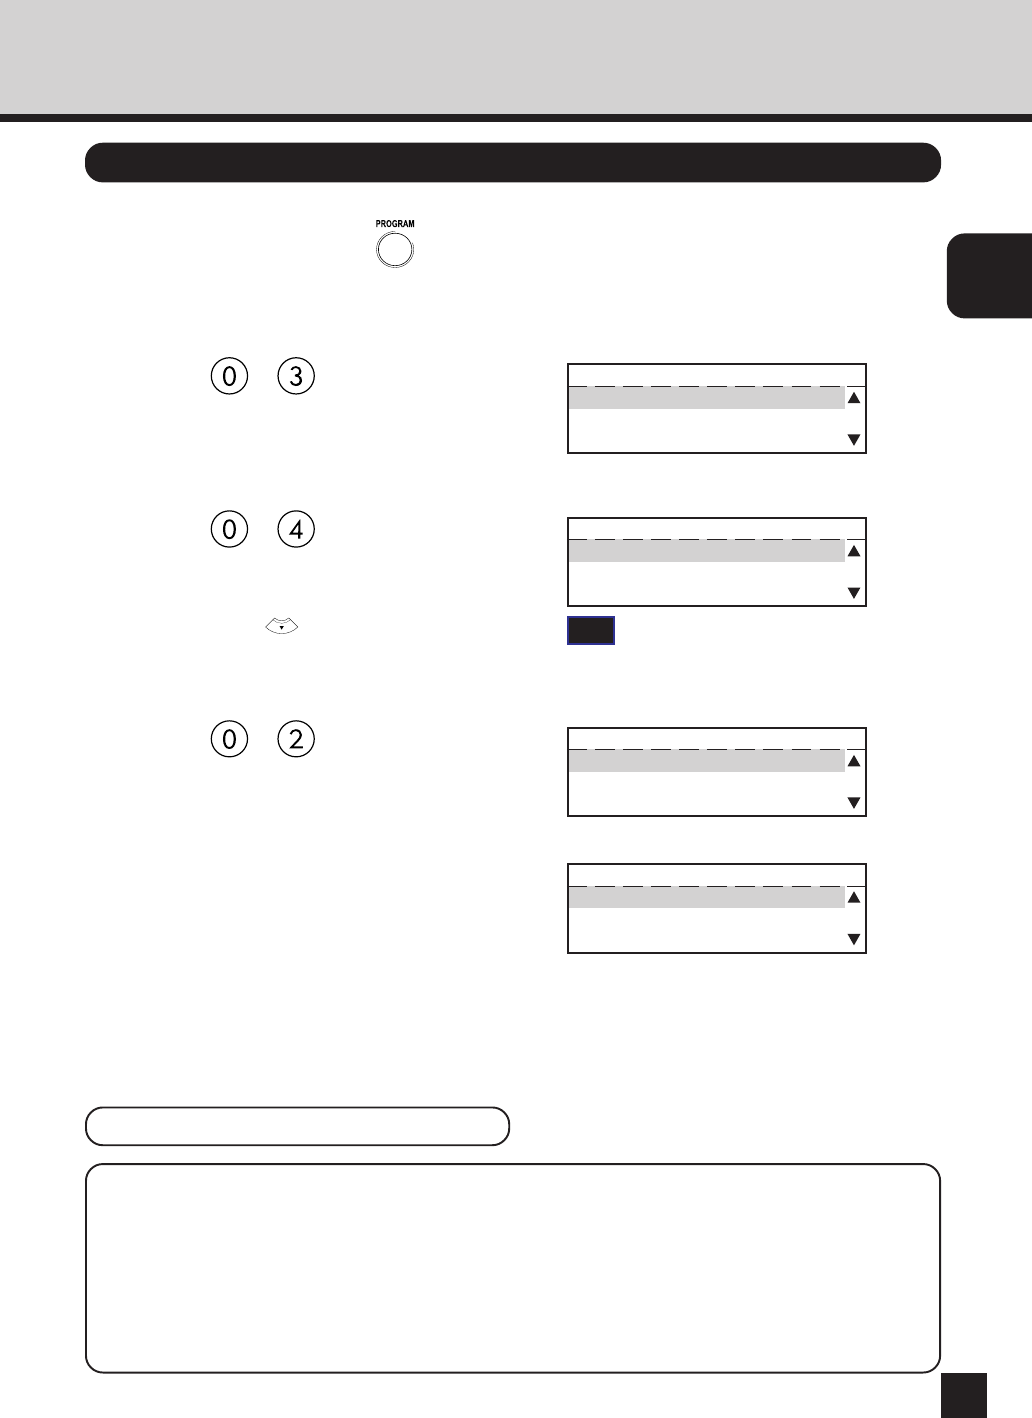
1
In Standby Mode, press key.
● The PROGRAM menu is displayed.
2
Press + on the Dial Keypad
to select INITIAL SETUP.
PROGRAM
01.DEFAULT SETTING
02.LISTS
03.INITIAL SETUP
3
Press + on the Dial Keypad
to select NETWORK.
● NETWORK is outside of the Message Display
Panel. Press to display the desired item.
INITIAL SETUP
02.LANGUAGE
03.TERMINAL ID
04.NETWORK
4
Press + on the Dial Keypad
to select TCP/IP.
NETWORK
01.COMPLETE
02.TCP/IP
03.NETWARE
5
When the IP address can be obtained
from the DHCP server, continue to
“Use DHCP Server”.
When the IP address is assigned
manually, continue to “Assign IP
Address Manually”.
TCP/IP
01.BOOTP/DHCP
02.IP ADDRESS
03.SUBNET MASK
SUPPLEMENTS:
● When the IP address is obtained from the DHCP server, TCP/IP printing cannot be
performed because the IP address changes each time the printer is powered on.
● If there is a WINS server and you want to use a WINS name for the NIC, see “Assigning
IP Address using MAP”. By configuring the port with a WINS name instead of an IP
address, TCP/IP printing can be performed.
Use DHCP Server
TIP
“03. TERMINAL ID” appears on the menu only
when the FAX option is installed.


