Creating Filters Using the OfficeConnect Remote 840 Manager
12-7
to. This allows you to go beyond the bounds of the “canned” condition
sentences.
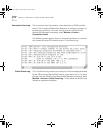
An overview and description of each filter screen is provided below:
You can get out of any screen by using the HTML side bar links. If you are
in the process of creating a new filter when you do this, and haven't yet
pressed the Save Filter button on the Filter Condition Summary
screen, the new filter information is lost.
Filter Screens
■
Filter Index
Index screen that allows you to either view the Filter Status or Filter
Create/ Modify screens.
■
Filter Status
Shows which direction/locations have filters.
■
Filter Create/Modify
Prompts you to select on which direction/location you are going to
setup or change a filter. Pressing the “Next” button brings up the
Filter Summary page.
■
Filter Summary
Shows you a summary of previously defined filters for this
direction/location and whether or not the filters are active.
Pressing the Create button brings up the Filter Action screen.
Selecting a filter name and pressing the Delete/Modify button brings
up the Filter Delete/Modify screen.
■
Filter Protocol
Prompts you to:
■
Provide a name for the filter (must be unique within this
direction/location as well as across all direction/locations). The
name may contain blanks but may not contain any of the following
characters: # ; | [ ] { }
■
Supply a name that can be up to 32 characters long. It is useful to
use the name field as a description field that summarizes the
purpose of the filter.
840ug.book Page 7 Friday, July 7, 2000 2:23 PM


