


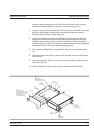


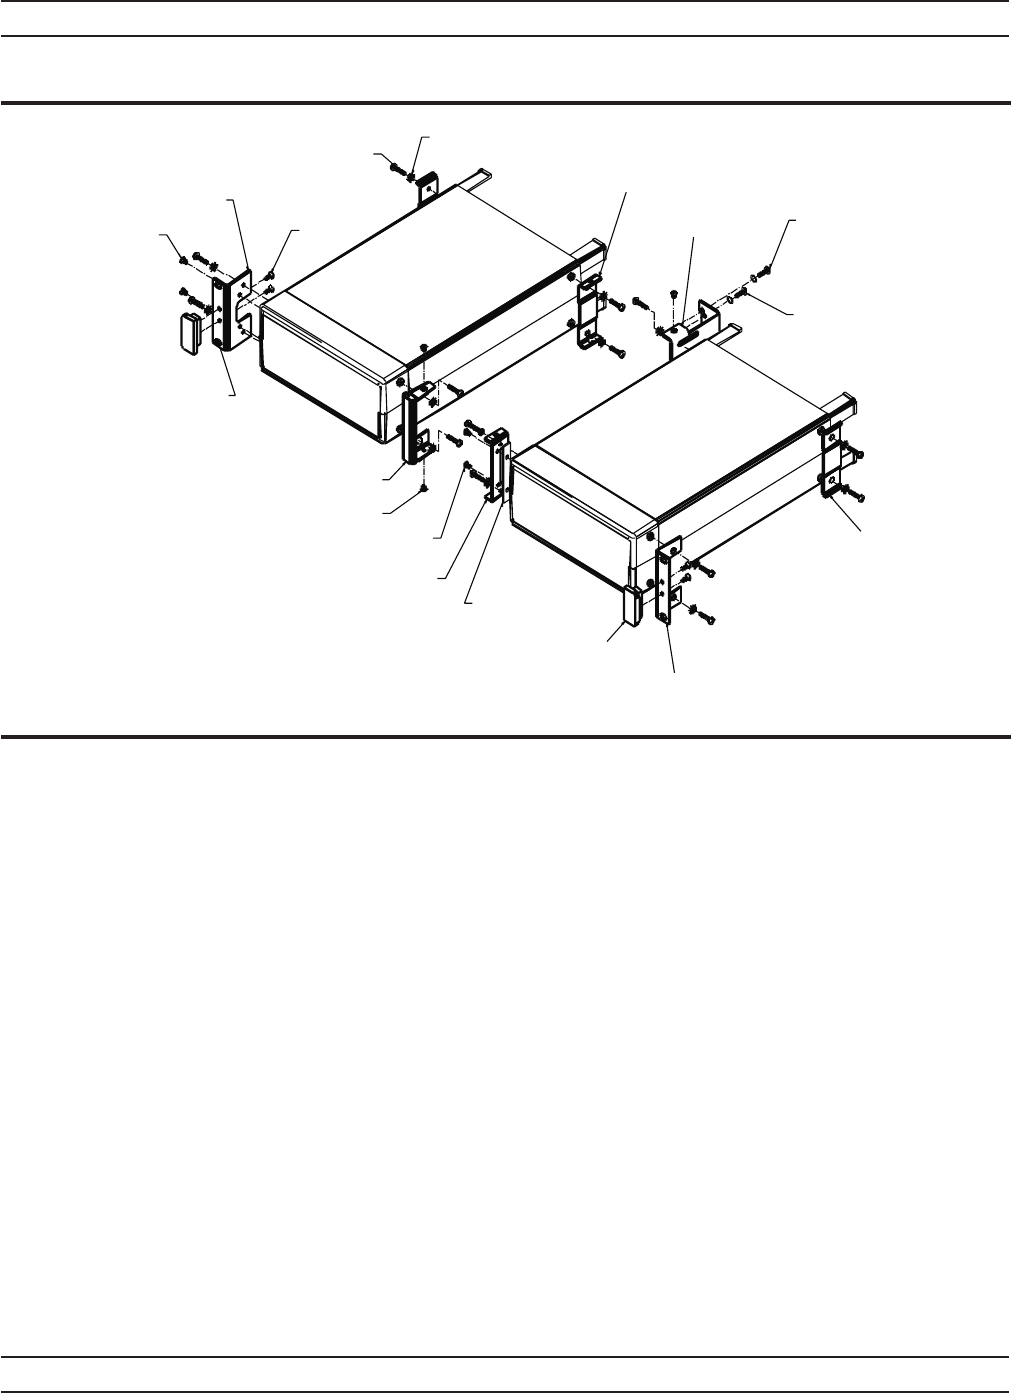
The procedure for fitting a ML2430A to a HP34401A Multimeter is as fol
-
lows:
1. Fit to the ML2430A Power Meter front brackets C37276, C37275 and
rear bracket C41449 using 6 screws 905-68 and 6 washers 900-345. Do
not tighten fully at this stage, only enough to allow the bracket to slide to
its maximum position.
2. Fit the center rear bracket 49413 using 2 screws 905-63. (See max.
torque settings page 2-6).
3. Fit to the HP34401A spacer plate 49439 in 2 positions with front brack
-
ets C37277 and 49415 using 4 screws 905-63. (See max. torque settings
page 2-6).
4. Offer up the HP34401A to the ML2430A unit ensuring the front bracket
fixing holes ofboth units are in line. Slide the center rear bracket 49413
forward till it makes contact with the rear face of the HP34401A.
5. Gently remove the HP34401A unit and tighten the 49413 bracket fixings
in its new position. (See max. torque settings page 2-6).
2-8 ML2430A OM
RACK MOUNTING INSTALLATION
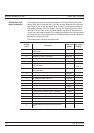
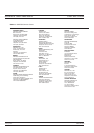
905-68
x16
900-345
x16
C37279
RACKMOUNT BRACKET
CENTER INNER REAR
49413
RACKMOUNT BRACKET
CENTER REAR
900-807 X2
900-806 X2
USETHESE FIXINGS
WHEN FITTING A MF2412A
COUNTER TO AML2430A
POWER METER
900-103 X2
900-807 X2
USETHESE FIXINGS WHEN
FITTING A HP34401A
MULTIMETER TO A ML2430A
POWER METER
900-795
x4
NOTE:
FIT COMPLETED
ASSEMBLY TO RACKUSING
DECORATIVE SCREW 900-821
X4 AND SPEED NUT 790-319
X4IN 4CORNER
POSITIONSAS SHOWN
49415
RACKMOUNT SIDE
BRACKET (MULTI-FIT).
USE THIS BRACKET
WHEN FITTING A
HP34401A
C41449
RACKMOUNT BRACKET
REAR SUPPORT
X2
USETHESE BRACKETS
WHEN FITTING A ML2430A
TO ANOTHER ML2430A
POWER METER.
905-63
x2
905-69
x4
C37275
RACKMOUNT
BRACKET
CENTER FRONT
C37277
RACKMOUNT
BRACKET
CENTER INNER
FRONT
905-63 x 4
USE THESE FIXINGS WHEN
FITTING A HP 34401A TO A
ML2430A OR MF2412A
783-1055
HANDLE
X2
C37276
RACKMOUNT SIDE
BRACKET
49439 X2
SPACER PLATE
USE ON A HP 34401A
ONLY,IN 2POSITIONS
WHEN FITTING TO A
ML2430A OR MF2412A.
USEALSO WITHSIDE
BRACKET 49415