


ENWW Performing duplexing 61
Performing duplexing
You can use the all-in-one to perform automatic or manual duplexing.
This section contains information about the following topics.
z Performing automatic duplexing
z Performing manual duplexing
Performing automatic duplexing
The all-in-one includes an auto-duplex unit for performing automatic duplexing.
The auto-duplex feature is turned off if you select a media type that is not supported by the
auto-duplex unit. See Supported media types and weights for more information.
To perform automatic duplexing on Windows computers
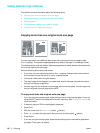
1 Load the appropriate paper in tray 1 or tray 2. Be sure to load the paper with the front side
facing down. See Loading the print media for more information.
2 On the File menu of the program, click Print, and then click Properties. (The options
might be different for your program.)
3 On the Finishing tab, click the Print on Both Sides check box.
4 When you are duplexing, you might need to increase the top margin slightly to make sure
that the pages align. This might cause the contents of a page to overflow to the next page.
Make sure that the Preserve Layout check box is selected in order to reduce the page
contents so that your page layout is not affected.
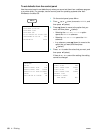
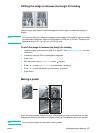
5 Select or clear the Flip Pages Up check box depending on which way you want the
binding. See the graphics in the printer driver for examples.
6 Click OK to close the dialog box.
7 Click OK to print the document.
To perform automatic duplexing on Mac OS X (10.1.x and 10.2.x)
computers
1 Load the appropriate paper in tray 1 or tray 2. Be sure to load the paper with the front side
facing down. See Loading the print media for more information.
2 On the File menu of the program, click Print.
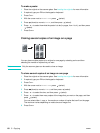
3 On the Duplex panel, click the Print on Both Sides check box and select the binding
orientation that you want (select the correct icon).
4 Click Print to print the document.
To perform automatic duplexing on Mac OS 9.2.x computers
1 Load the appropriate paper in tray 1 or tray 2. Be sure to load the paper with the front side
facing down. See Loading the print media for more information.
2 On the File menu of the program, click Print.
3 On the Layout panel, click the Print on Both Sides check box and select the binding
orientation that you want (select the correct icon).
4 Click Print to print the document.