8. Refer to Install a media roll in the printer using the main scroller and install the main scroller in the
printer.
9. Use the front panel feed menu to feed the media through the media feeder far enough for it to be
taken-up on the take-up reel.
10. Use adhesive tape to attach the edge of each media to the media tube on the take-up reel. Attach the
center of the media first then the outer edges, making sure the media is straight.
Inner take-up is recommended because the amount of media wound with outer take-up is less, which
could cause abrasion to the printed surface when the diameter of the wound media becomes large,
consequently degrading the image quality.
11. Adjust the positions of the media tube flanges to match the media width.
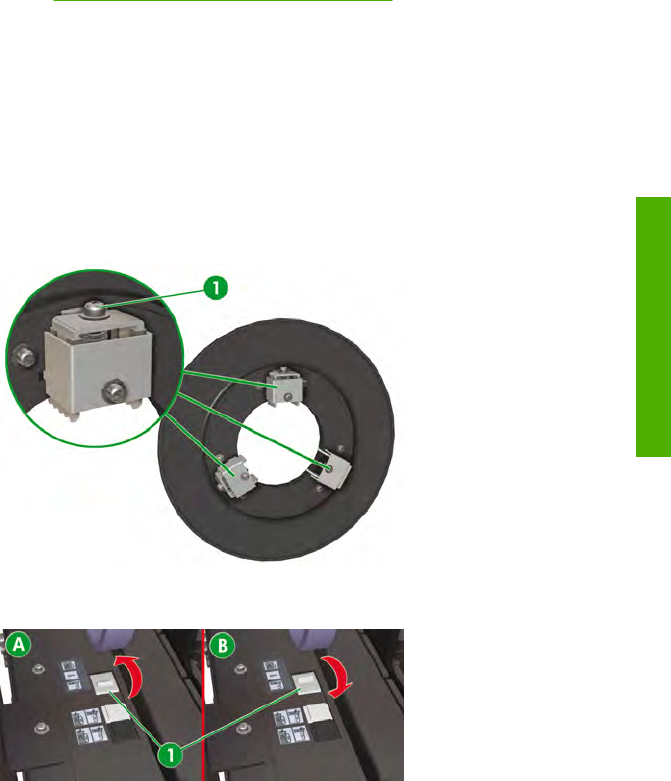
12. Tighten the three locking screws (1) on each media tube flange to lock the flanges in position. Use
the indications on the labels to equally tighten the locking screws.
13. At the rear of the printer, set the white media winding direction switch (1) to match the required take-
up winding direction, inner (A) or outer (B).
ENWW Use media tube flanges 63
How do I perform basic media
o
p
erations?


