12
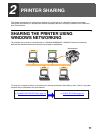
PRINTER SHARING
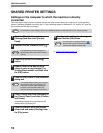
SHARED PRINTER SETTINGS
Settings on the computer to which the machine is directly
connected
Follow the steps below to use the computer directly connected to the machine as a print server. If your operating
system is Windows 95/98/Me, start from step 1. If your operating system is Windows NT 4.0, 2000 or XP, open the
control panel and then start from step 6.
1
Click the [Start] button, point to
[Settings] and then click [Control
Panel].
2
Double-click the [Network] icon ( ).
3
Click the [File and Print Sharing]
button.
4
Enable [I want to be able to allow
others to print to my printer(s).] by
clicking the checkbox, and then click
the [OK] button.
5
Click the [OK] button in the [Network]
dialog box.
6
Click [Printers and Other Hardware] in
the [Control Panel], and click [Printers
and Faxes].
In operating systems other than Windows XP,
double-click the [Printers] icon.
7
Click the [SHARP AR-XXXX] printer
driver icon and select [Sharing] from
the [File] menu.
8
Configure the settings for sharing and
then click the [OK] button.
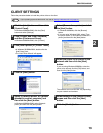
☞ CLIENT SETTINGS (page 13)
For information on the settings, refer to your operating manual or to the help files for your operating system.
Note
If the [Network] icon does not appear in
Windows Me, click [view all Control Panel
options].
If a message appears asking you to restart
the computer, click the [Yes] button and
restart the computer. After restarting the
computer, open the printer folder and
continue the setup procedure from Step 6.
Note
Note
For information on a setting, click the
button at the top-right of the dialog box and
then click the setting to display Help.
Note


