FreeFlow Process Manager Operator and Administrator Guide
2-68
Workflow Builder
Setting up or modifying an image watermark
Image watermarks can be transparent or opaque, scaled, rotated,
variably positioned from the document edge and can appear either
underneath or on top of the page content. Colorization is not
supported.
To set up or modify an image watermark
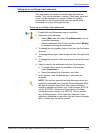
1. Double-click the Watermarks step in a workflow.
2. Select one of the following:
•Select [New], and then select [Image Watermark] to set
up a new image watermark.
• Select a watermark from the list, and then select [Modify]
to change an existing image watermark.
3. Enter a file path or select [Browse] to locate a TIFF, JPEG,
BMP, or PDF image file.
NOTE 1: The selected image must reside on a local drive.
NOTE 2: Only page 1 of the PDF is selected.
a. In the Browse for watermark image file dialog, select a file.
b. Select [Open]. The dialog closes and the path and file
name display in the Watermark filename text box.
4. Select a percentage from 1 to 200 to scale the image.
5. Select or type the horizontal position from the PDF document
box: From left, Center, or From right.
6. Select or type the vertical position from the PDF document
box: From top, Center, or From bottom
7. Select the position relative to Crop Box, Media Box, Bleed
Box, Trim Box or Art Box.
8. Select the desired degree of rotation, from 0-359 degrees. The
icon changes to reflect the selected rotation.
9. Select a transparency from 0-100. The greater the
transparency level, the less opaque the watermark.


