


230 CHAPTER 3: DEVICE CONFIGURATION
Example:
1...00:e0:bb:04:4e:a5-4 Trunk
The 4 after the hyphen indicates channel number 4.
5 To change the name of the E1 board, edit the contents of the Board
Name field. This name helps you identify the E1 board in a list.
6 Enable the On Line check box.
7 Click Apply and then click OK.
To connect the E1 line and activate the span:
1 Plug the E1 line into the E1 board.
2 Select ISDN PRI Span List from the Card Type drop-down list.
3 Select the E1 span from the list and click Modify.
4 Click the On Line check box.
5 Click Apply.
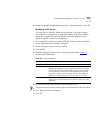
To verify that the span status changes from Offline to Ready:
1 On the Digital Line Cards tab, select ISDN PRI Span List from the Select
Device Type list.
2 Click Apply.
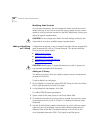
Configuring E1 Groups
To configure the E1 Groups:
1 On the Digital Line Cards tab, select ISDN PRI Group List from the Select
Device Type list.
2 Click Apply.
3 From the ISDN PRI Group List, select PRI Group 1.
4 Click Modify. The Modify Group dialog box appears.
5 Select Restricted from the Trunk to Trunk drop-down list.
If you select Unrestricted, users can transfer incoming calls to outgoing
trunks. 3Com does not recommend this setting because it enables the
possibility of toll fraud.
6 Click the On Line check box.
7 Enter 500 in each of the four AutoExt text boxes and click OK.