


Configuring and Managing E1 Digital Line Cards 237
Removing an E1 Group
You may want to remove groups if you no longer need them.
To remove a group:
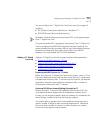
1 On the Digital Line Cards tab, select ISDN PRI Group List from the Select
Device Type drop-down list and click Apply.
2 Select the group you want to remove.
3 Click Remove. A prompt appears asking if you want to remove the group.
4 Click Yes to remove the group.
Modifying E1 Card
Channels
A channel can take a single call. This section describes how to modify
channels for an installed E1 card and how to view the status of an
existing channel.
CAUTION: Do not modify channels unless a 3Com Technical Support
representative advises you to do so. Modifying an ISDN channel
disconnects any existing calls on that channel.
If you use Auto Discovery to add channels on an E1 PRI line, note that the
30 channels discovered are numbered 1 through 15, and 17 through 31.
This reflects the physical channel mapping on the E1 interface, where
channel 16 is the ISDN D-channel, used for signaling.
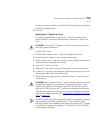
To modify a channel on an installed E1 card:
1 On the Digital Line Cards tab select ISDN PRI Channel List from the
Select Device Type drop-down list and click Apply.
2 Select the channel that you want to modify.
3 Click Modify.
4 Fill in or change the fields in the appropriate Modify Channel dialog box.
Table 45
describes each parameter.
Table 48 Channel Parameters
Parameter E1 ISDN PRI Options
Group Name A name that helps you identify this group in lists.