


322 CHAPTER 6: NBX MESSAGING
7 Set the greeting schedule.
8 Review and test the system.
Using the Voice Application Setup Utility
From an NBX telephone, you can use the Auto Attendant Setup Utility.
Follow these steps:
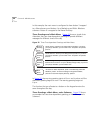
1 Lift the NBX telephone handset, and then press the MSG button to access
the Voice Mail system.
2 At the voice mail password prompt, press
*.
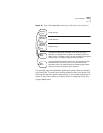
3 At the voice mail extension prompt, dial
999 if you are using a 3-digit dial
plan or
9999 if you are using a 4-digit dial plan.
4 Enter the Auto Attendant password. The default password is 0000. 3Com
recommends that you change this password.
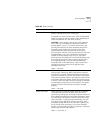
0000 press 1 to assign actions to dial pad key, 9 to record
greetings, schedules, change password
5 Follow prompts to assign key pad button actions, record and play back
greetings, change the schedule (morning, afternoon, and evening) and
change the Auto Attendant password.
Testing the Auto
Attendant
Before using your system, 3Com strongly recommends that you review
and test it to verify that all features work as you intend. Use this checklist
to verify that your system is ready:
■ Do your recorded prompts match your key pad button actions?
You can define key pad button actions through the NBX NetSet utility
(see “
Auto Attendant Buttons” on page 316) or through the Voice
Application Setup utility.
■ Do your time-dependent greetings become active at the times you
want?
If not, you can use the NBX NetSet utility (see “
Time-dependent
Greetings” on page 310) or the Voice Application Setup utility to
change the start times of your morning, afternoon, and evening
greetings.
■ Do your single-digit transfers and transfer to the general mailbox take
a caller to a valid destination?
■ When callers reach a mailbox of a single-digit transfer and transfer to
the general mailbox, do they hear an appropriate greeting?