


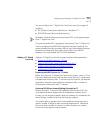

244 CHAPTER 3: DEVICE CONFIGURATION
You are now ready to configure the T1 Digital Line Card for either
DS1 signaling or ISDN PRI signaling. Before you configure a T1 card, you
must configure the system Dial Plan as described in Chapter 2
.
Configuring a
T1 Digital Line Card
for the DS1 Protocol
These sections tell you how to use the NBX NetSet utility to set up your T1
Digital Line Card for DS1 protocol:
■ T1 DS1 Configuration
■ Configuring T1 Groups (DS1)
■ Verifying T1 Group Membership (DS1)
■ Completing the T1 Configuration (DS1)
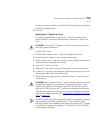
Before you configure a T1 Digital Line Card for DS1 protocol, read the
cautionary note.
CAUTION: Wait 3 minutes for the T1 card to initialize and for the system
to update its database. You must wait this long because the T1 card
reboots twice during the initialization process. If you attach a console
cable to the COM1 port on the T1 card and use Hyperterm software to
view the text output from the card, you see status messages associated
with the two reboot processes. See “
Connecting a Computer to a Serial
Port” on page 370.
Another way that you can be sure that it is safe to proceed is to examine
the status lights on the front panel of the T1 card. After the Auto
Discovery process has completed, and before you connect the T1 Digital
Line Card to the telephone company’s T1 line, the CF (Carrier Fail) light
should appear solid green.
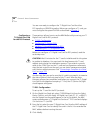
T1 DS1 Configuration
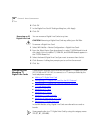
To set up the T1 card for the DS1 protocol:
1 On the Digital Line Cards tab, select T1/ISDN Board List from the Select
Device Type list, and click Apply. All Digital Line Cards (T1, E1, or BRI-ST)
that the system has discovered appear in the list. By default, the NBX
system autodiscovers a T1 Digital Line Card as a T1 DS1 card and displays
it in the list as T1 (not PRI).
2 From the list, select the new T1 Digital Line Card. Use the MAC address of
the T1 Digital Line Card to identify the card in the list. You recorded the
MAC address before inserting the card.
3 Click Modify.