


Configuring and Managing E1 Digital Line Cards 231
Verifying E1 Group Membership
To verify that all channels are in the member list:
1 On the Digital Line Cards tab, select ISDN PRI Group List from the Select
Device Type list and click Apply.
2 Select the group that you want, and click Membership.
3 Scroll through the Member List to verify that all 30 channels are present.
Completing the E1 Configuration
To complete the E1 configuration, perform these steps:
1 On the Digital Line Cards tab, select ISDN PRI Channel List from the
Select Device Type list and click Apply.
2 Wait approximately 30 seconds for the status of each channel to change
from Ready to Idle. You can also watch the Nominal status light on the E1
card front panel. When it stops flashing and stays on, the board is active.
If the channel status does not change to Idle, verify that you have enabled
the On Line check box for the card and the span.
While you are waiting, you can click Apply to refresh the list of channels
and to see the updated status.
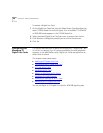
E1 Card Status Lights The E1 card contains these status lights:
■ CF — Carrier Fail (when lit, indicates either a red alarm or blue alarm)
■ RA — Remote Alarm (yellow alarm)
■ LB — Loopback
■ Nominal — E1 card is framed
Modifying an E1 Card These sections tell you how to modify a E1 card that is already installed in
the system:
■ Modifying the E1 Card Name
■ Modifying an E1 Span
■ Configuring Partial E1 Lines
■ Modifying Audio Controls