Copyright © 2007 • MCL Technologies • All Rights Reserved
www.mcl-collection.com
Chapter 3 : Creating a Project
As you make your changes, the result will appear in the display in the
top-half of the editing window.
The clock
next to the Welcome screen in the top-half of the editing
window sets the delay period for this screen. By default, this delay is
set to 2 seconds. This means that when the project is run on the
printer, the printer will pause for 2 seconds on the Welcome screen
before moving on to the Select Label screen. You can edit the Welcome
screen delay:
5 Edit the value of the delay from 0 - 99 seconds, or
6 Increment or decrement the value of the delay using the up and
down arrows
beside the delay entry field.
If the delay is set to zero (0) seconds, a user will have to press a
button on the printer to advance the application to the next screen.
To accept the changes made to the Welcome screen:
7 Click OK
Graphical Display -
Large
To edit the Welcome screen for a graphical display project, on the User
Interface window:
1 Click on the Welcome screen, or
2 Click the Welcome button at the bottom of the window
Alternatively, on the User Interface window:
3 Simply double click on the thumbnail view of the Welcome screen
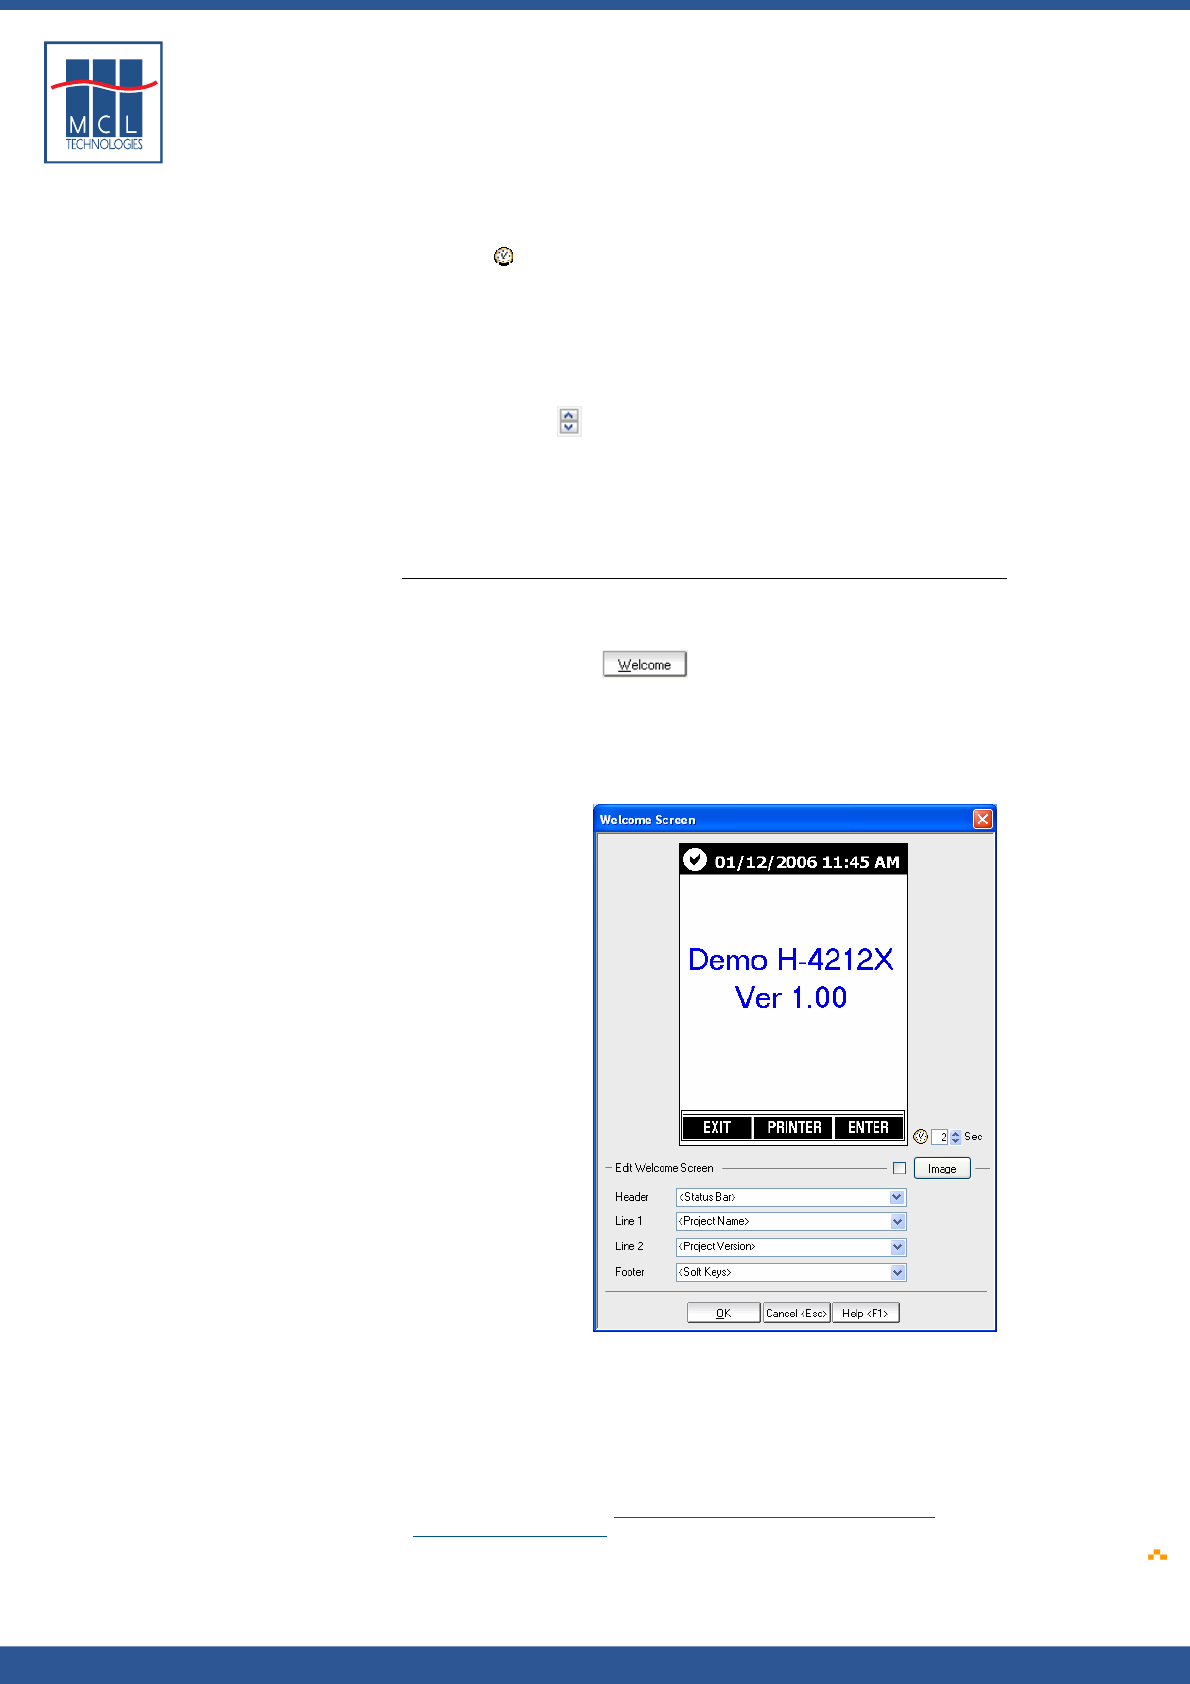
The Welcome Screen editing window for a large graphical display
printer is as shown here:
Graphical Display
Elements
Notice that this screen displays a Status Toolbar in a header across the
top, printer key labels in a footer across the bottom, and two lines of
text on the main display. Each of the screens for graphical display
printers uses this same format.
From left to right, the Status Toolbar shows respectively Printer Status,
printer system date, and printer system time. For more information
about Printer Status see Section
3.2 – User Interface - Graphical
Display - Status Toolbar.
October 2007 Page
39
