Copyright © 2007 • MCL Technologies • All Rights Reserved
www.mcl-collection.com
Chapter 1 : Primer
1.3. Project Flow
General introduction 123 Print structures your project flow using a combination of screens
and processes that you create via 123 Print’s User Interface and
Labels.
This section gives a high level view of the flow and interrelationship
between the screens that are created via the User Interface and those
created via Labels.
With User Interface, you can print any static label you want.
With Labels, you can change a static label into a dynamic label by
merging in variable data from data collection, user screen prompts, and
processing logic.
Please reference Section
3.2 – User Interface and Section 3.3 – Labels
for detailed information about these functions.
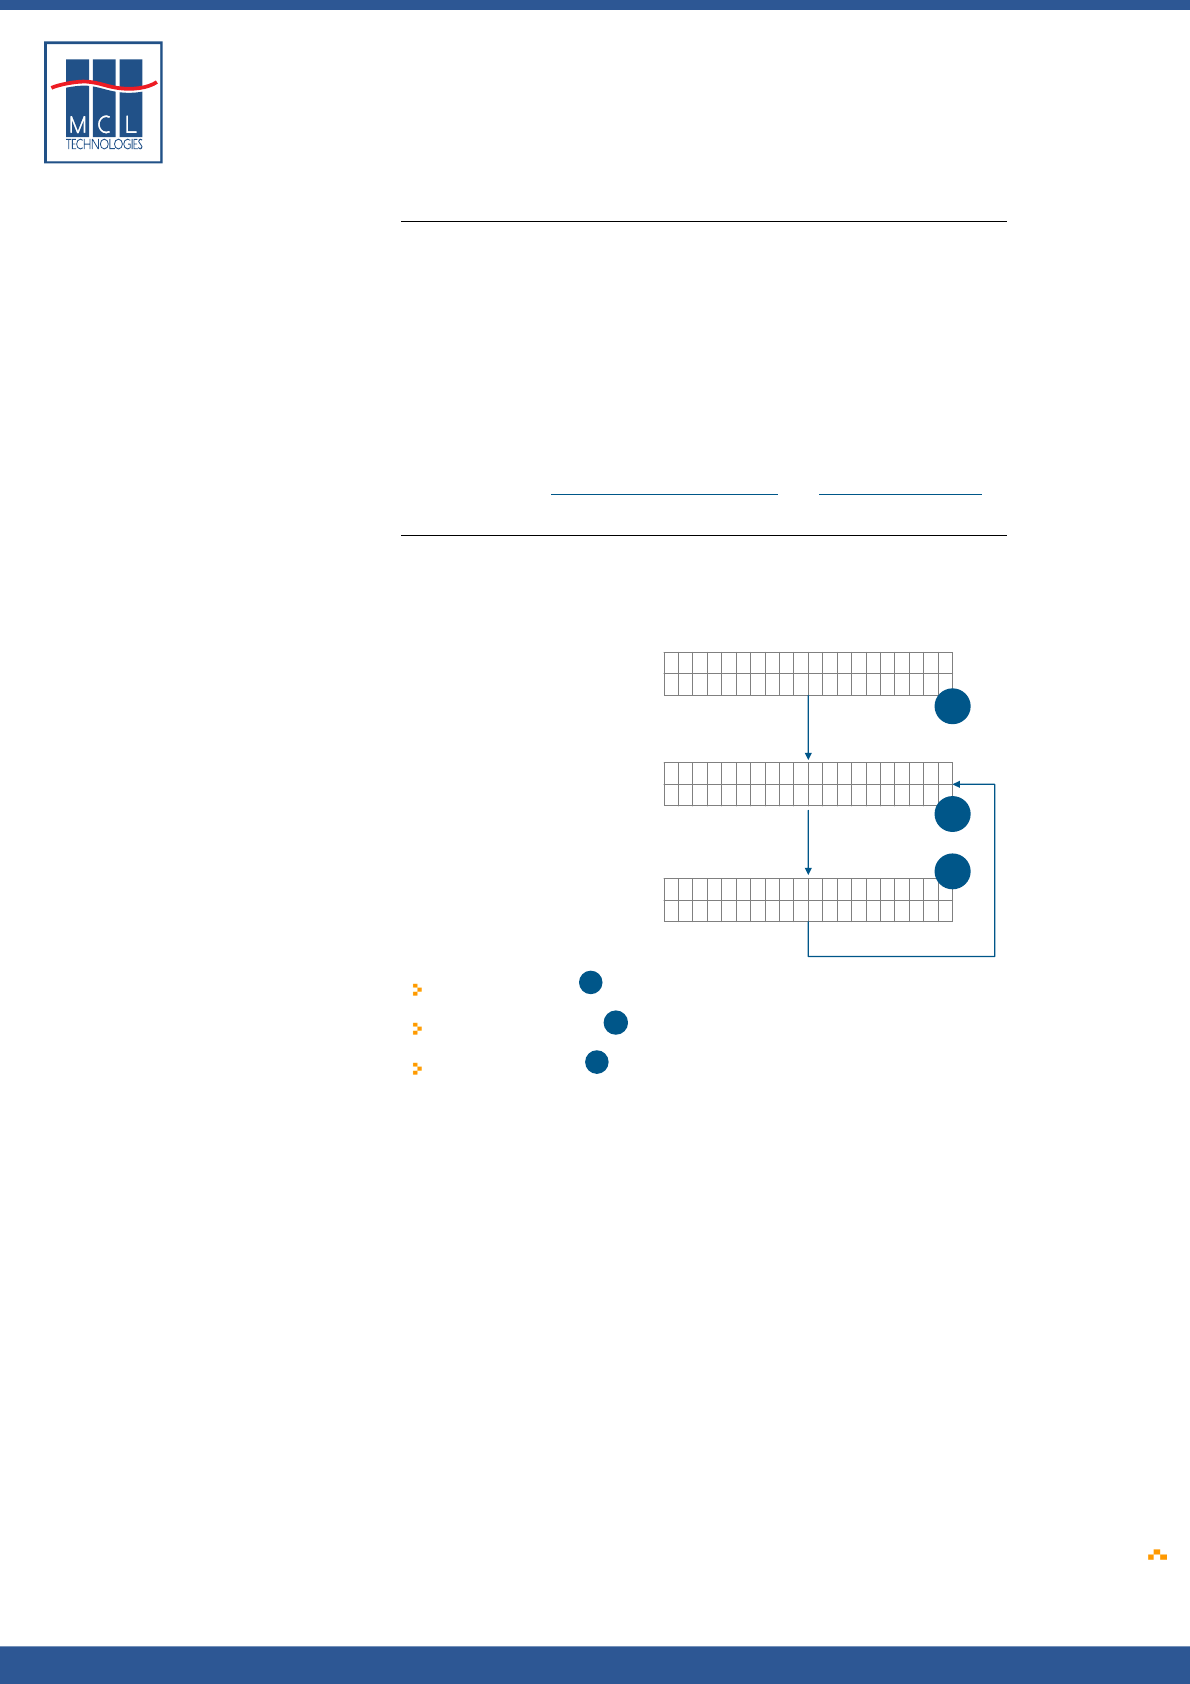
User Interface Every 123 Print project follows a pre-defined screen flow. You configure
these screens through the User Interface function. This is the only
screen flow function you need if you want to print static labels.
This core flow is depicted here.
Your Project Name
Ver 1.00
Select Label:
<Label Name>
<Label name>
Qty to Print:
1
2
3
The first screen
1
is a Welcome screen.
The second screen
is the Select Label screen.
The third screen
3
is the Quantity to Print screen.
These screens are displayed in a black font on the Datamax printers.
When your 123 Print project is run on the printer, it first displays the
Welcome screen. It then goes into a loop alternating display between
the Select Label screen and the Quantity to Print screen.
Your application will loop infinitely between the second and third
screens until you press the Menu (ESC) button on the front panel of the
Datamax printer.
As you design your project in 123 Print, you have the option to
customize the Welcome screen. By default 123 Print proposes your
project name for the Welcome screen.
You then add the labels you want to be able to print from your project.
When your project is run, this list of labels is presented on screen (2).
The user presses the Fwd ↑ and Rev ↓ buttons on the printer’s front
panel to scroll through the list of available labels and, by pressing the
Ent ↵ button, selects the label that is required for a given operation.
Here is an example of what screen (2) might look like on a printer when
the fourth label in your project is a label for pallets:
October 2007 Page
9
