


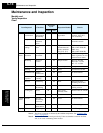
Maintenance and Inspection
Troubleshooting
and Maintenance
6–14
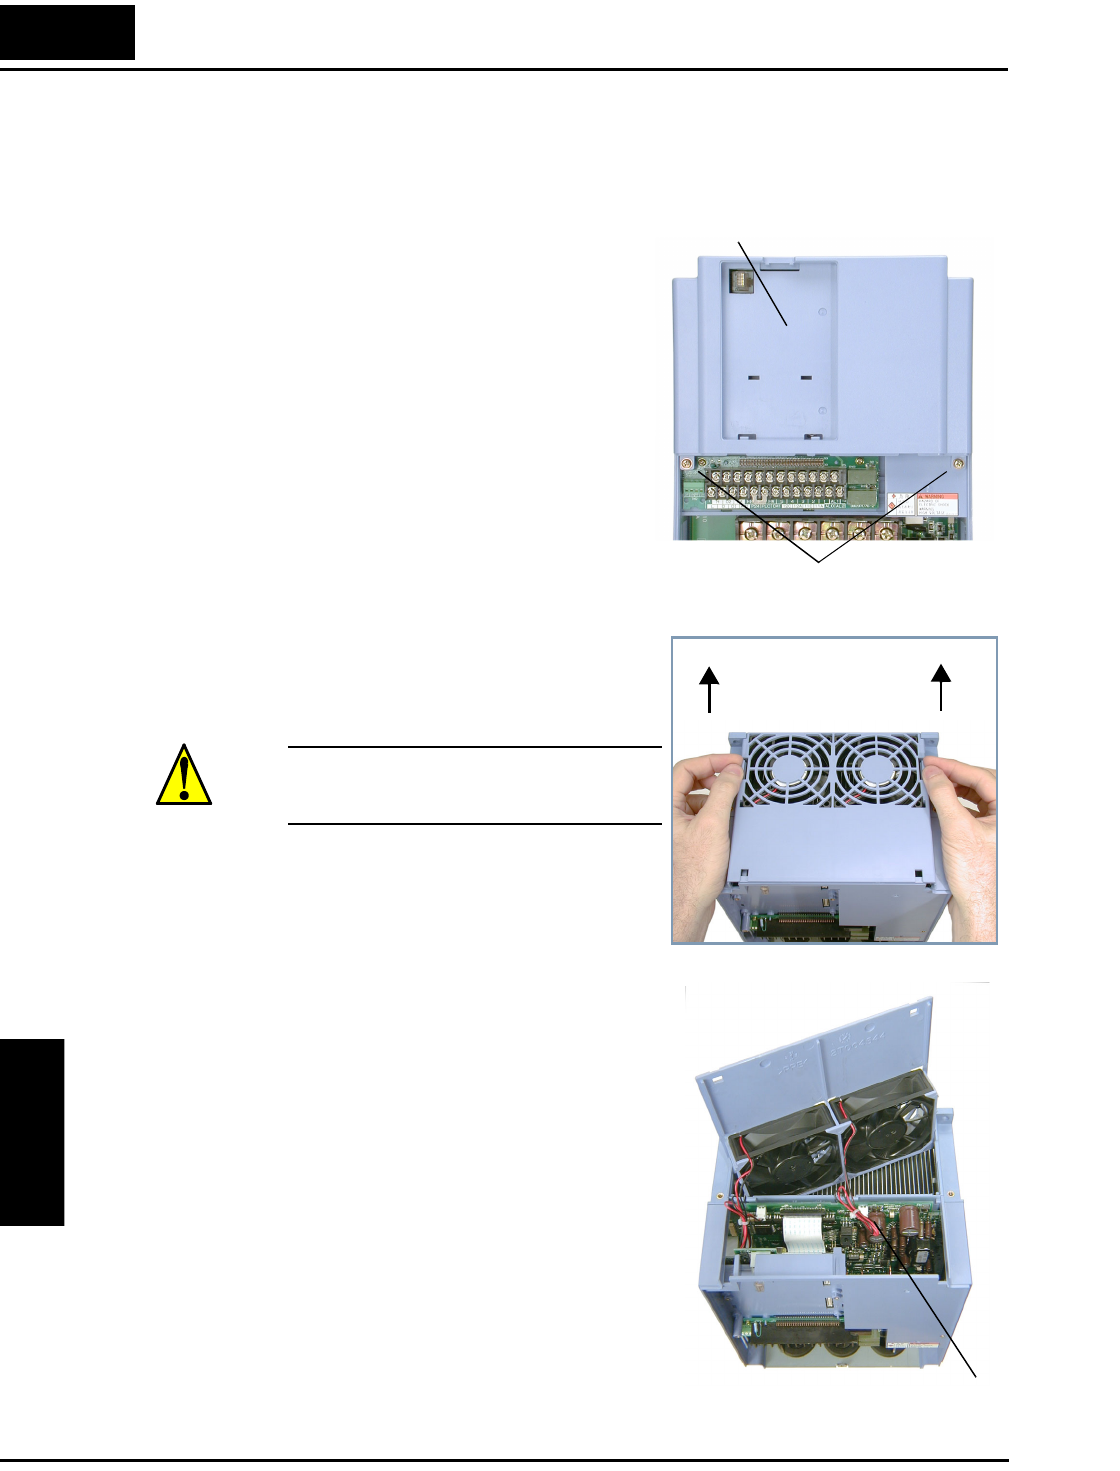
Fan Assembly
Replacement
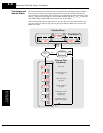
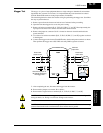
The L300P Series inverters have field-replaceable fan units. They include an internal connector
for easy removal and replacement. You will need to remove the front panel covers to remove
the fan assembly. First, be sure to remove power from the unit and wait at least 5 minutes
before accessing the wiring area.
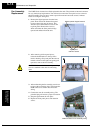
1. Remove the digital operator from the front
panel. Then remove the bottom front panel
to expose the wiring area as shown. This
will also expose the retention screws for the
top front panel. Remove these screws,
which will allow the front panel to hinge
upward and unfasten from the unit.
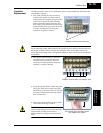
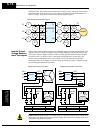
2. After removing all front panel pieces,
locate the thumb latches in the top of the
inverter housing. Grasp and push the releases
inward as shown to the right, and gently pull
upward to remove the fan assembly.
CAUTION: Remove the fan assembly carefully,
since it is attached to the unit via connecting
wires.
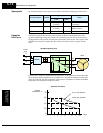
3. After unfastening the fan assembly, turn it over
to expose the connecting wires. Then locate the
PWB connector as shown. Disconnect the
wiring.
4. Connect the new fan assembly wiring. The
polarized plug will ensure a proper connection.
5. Snap the replacement fan into place.
6. Replace all front panel pieces and retention
screws.
Digital operator keypad removal
Upper panel
retention screws
PWB connector for fan assembly wiring