


User Tool Menus In Detail
159
3
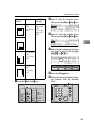
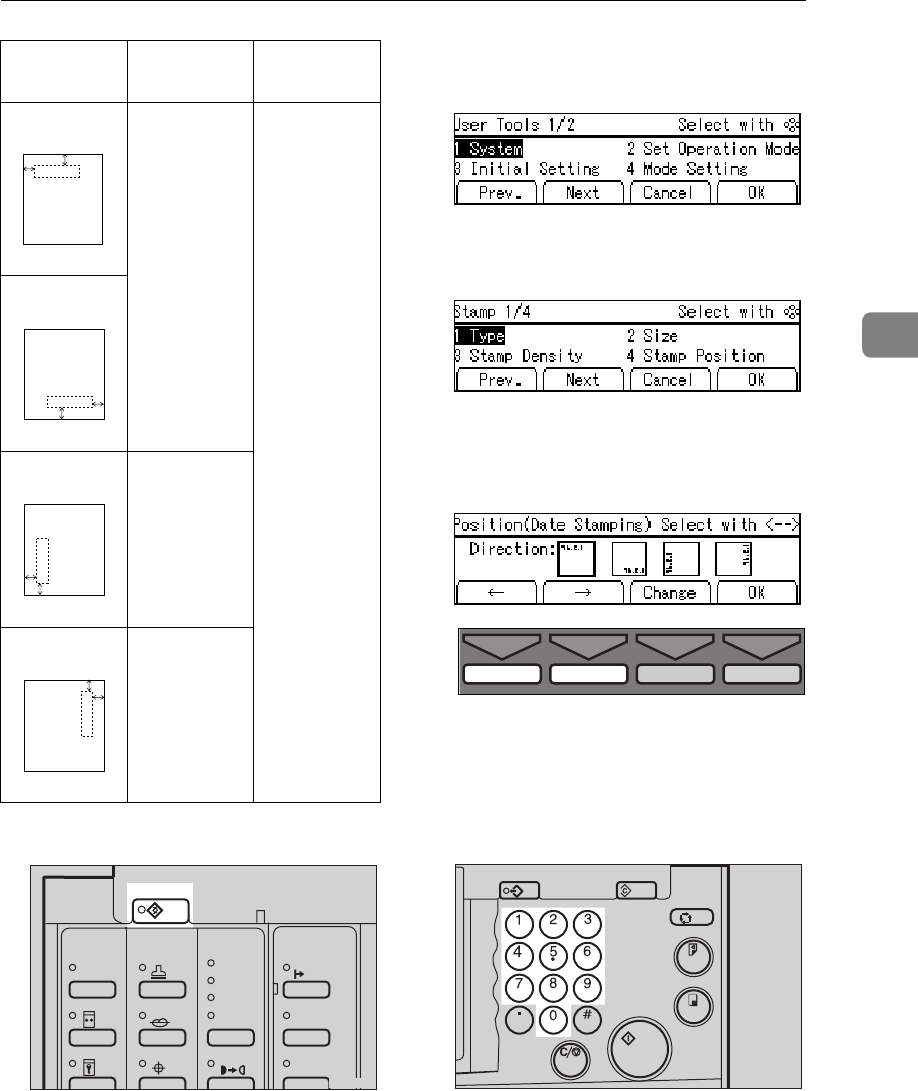
A Press the
{
{{
{
User Tools
}
}}
}
key.
B Enter 5 with the Number keys.
Then press the
[
OK
]
or
{
{{
{
Enter
}
}}
}
key.
C Enter 11 with the Number keys.
Then press the
[
OK
]
or
{
{{
{
Enter
}
}}
}
key.
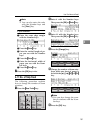
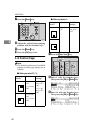
D Select the date stamping direction
you want to adjust with the
[←
←←
←]
,
[→
→→
→]
,
{
{{
{
~
~~
~
}
}}
}
, or
{
{{
{
}
}}
}
}
}}
}
key.
E Press the
[
Change
]
key.
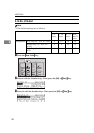
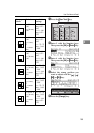
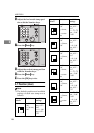
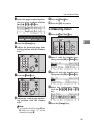
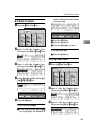
F Adjust the horizontal date stamp-
ing position with the Number
keys.
Stamp po-
sitions
Default Available
settings
a = 8 mm,
0.32"
b = 20 mm,
0.80"
a = 8 – 40
mm, 0.32" –
1.60"
b = 8 – 40
mm, 0.32" –
1.60"
a = 20 mm,
0.80"
b = 12 mm,
0.48"
a = 20 mm,
0.80"
b = 8 mm,
0.32"
a
b
dd.mm.yy
GRDPOS0E
a
b
dd.mm.yy
GRDPOS1E
a
b
dd.mm.yy
GRDPOS2E
a
b
dd.mm.yy
GRDPOS3E
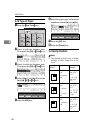
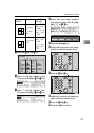
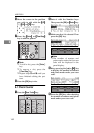
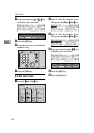
User Tools
Stamp
Make-Up
Overlay
Tint
Darker 2
Darker 1
Normal
On Line
Lighter
Image Density
TPES250N
TPES530E
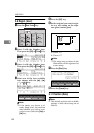
Program Clear Modes
Auto Cycle
Proof
Print
Enter
Start
Clear/Stop
TPES040N