


Disassembly, Reassembly and Lubrication
3-19 CL-S6621
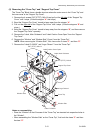
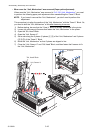
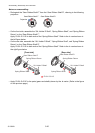
Note on reassembling:
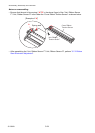
• When assembling the “SA, Fan”, pass the cable
between the boss and the frame as shown on the right.
(Wind the cable on the boss counterclockwise.)
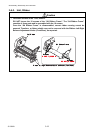
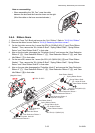
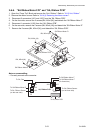
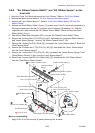
3-6-5. Ribbon Gears
1. Open the “Cover Top” Block and remove the “Unit, Ribbon”. Refer to “3-6-2 Unit, Ribbon”.
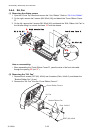
2. Remove the ribbon covers. Refer to “
3-6-4(1) Removing the ribbon covers”.
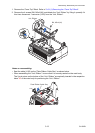
3. On the front side, remove the 1 screw (No.0PH (4-0.3)M2x3 (NI)) () and “Plate Ribbon
Washer”. Then, remove the “SA, Holder R Shaft”, “Spring Ribbon Shaft”, “Spring Ribbon
Return” and “Gear Ribbon Shaft F” in that order.
4. Also on the front side, disengage the “Polyslider, Knob-2” and remove the “Gear Reduction
Ribbon 2” (), “Gear Reduction Ribbon 1” (), “Gear Reduction Ribbon 3” (), and “Gear
Idle Ribbon” () in that order.
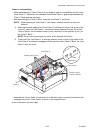
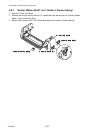
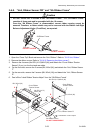
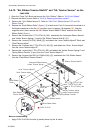
5. On the rear side, remove the 1 screw (No.0PH (4-0.3)M2x3 (NI)) () and “Plate Ribbon
Washer”. Then, remove the “SA, Holder R Shaft”, “Spring Ribbon Shaft”, “Spring Ribbon
Return” and “Gear Ribbon Shaft R” in that order.
6. Also on the rear side, disengage the “Polyslider, Knob-2” and remove the “Gear Reduction
Ribbon 2” (), “Gear Reduction Ribbon 1” (), “Gear Reduction Ribbon 3” (), and “Gear
Idle Ribbon” () in that order.
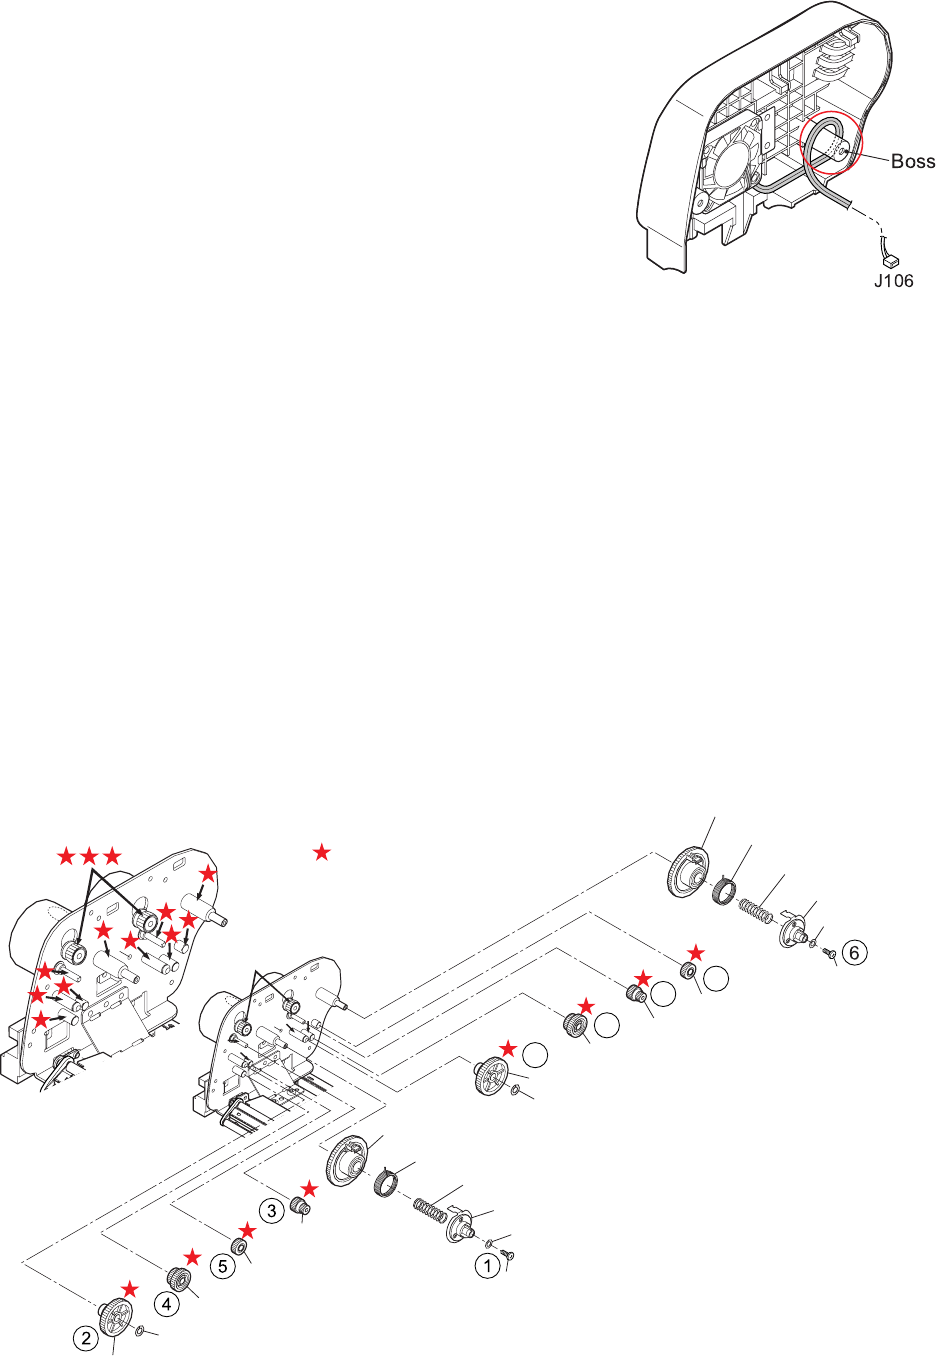
Gear Ribbon Shaft F
Spring Ribbon Return
SA, Holder R Shaft
Gear Reduction
Ribbon 1
Gear Idle Ribbon
Gear Reduction Ribbon 3
Polyslider, Knob-02
Gear Reduction Ribbon 2
Plate Ribbon Washer
No.0PH (4-0.3)M2x3 (NI)
Polyslider, Knob-02
Gear Reduction Ribbon 3
Gear Reduction Ribbon 1
Gear Idle Ribbon
Gear Ribbon Shaft R
SA, Holder R Shaft
No.0PH (4-0.3)M2x3 (NI)
Spring Ribbon Shaft
Spring Ribbon Shaft
Gear Reduction Ribbon 2
Plate Ribbon Washer
Spring Ribbon Return
FLOIL G-474C
[Magnified View]
8
7
9
10