Chapter 14. Working With Storage
134
4. Click Upload Volume.
5. Provide the following:
• Name and Description. Any desired name and a brief description that can be shown in the UI.
• Availability Zone. Choose the zone where you want to store the volume. VMs running on hosts
in this zone can attach the volume.
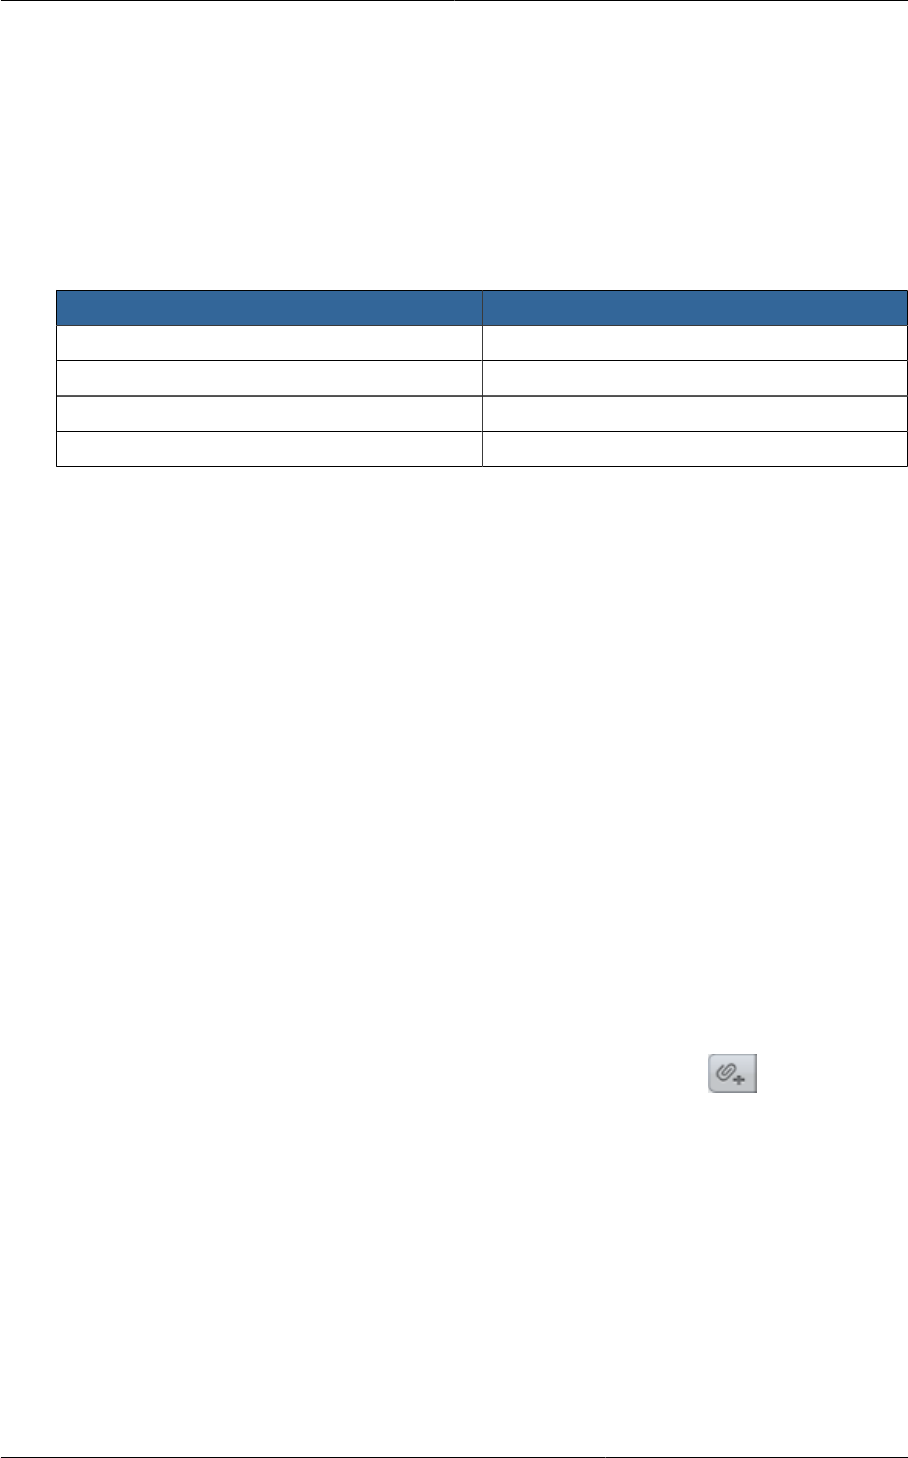
• Format. Choose one of the following to indicate the disk image format of the volume.
Hypervisor Disk Image Format
XenServer VHD
VMware OVA
KVM QCOW2
OVM RAW
• URL. The secure HTTP or HTTPS URL that CloudPlatform can use to access your disk. The
type of file at the URL must match the value chosen in Format. For example, if Format is VHD,
the URL might look like the following:
http://yourFileServerIP/userdata/myDataDisk.vhd
• MD5 checksum. (Optional) Use the hash that you created in step 1.
6. Wait until the status of the volume shows that the upload is complete. Click Instances - Volumes,
find the name you specified in step 5, and make sure the status is Uploaded.
14.4.3. Attaching a Volume
You can attach a volume to a guest VM to provide extra disk storage. Attach a volume when you first
create a new volume, when you are moving an existing volume from one VM to another, or after you
have migrated a volume from one storage pool to another.
1. Log in to the CloudPlatform UI as a user or admin.
2. In the left navigation, click Storage.
3. In Select View, choose Volumes.
4.
Click the volume name in the Volumes list, then click the Attach Disk button
5. In the Instance popup, choose the VM to which you want to attach the volume. You will only see
instances to which you are allowed to attach volumes; for example, a user will see only instances
created by that user, but the administrator will have more choices.
(OVM) If the VM is running in the OVM hypervisor, the VM must be stopped before a new volume
can be attached to it.
6. When the volume has been attached, you should be able to see it by clicking Instances, the
instance name, and View Volumes.


