Installing Adapters
Installing Adapters
Before you begin:
Be sure you have:
Read “Electrical Safety” on page 75 and “Handling
Static-Sensitive Devices” on page 77 (or your safety booklet).
Read the instructions that come with the adapter.
Removed the server cover (see “Preparing to Install Options”
on page 78).
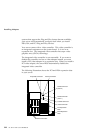
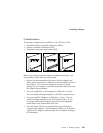
Your server has ten connectors called expansion slots. If your server
came with a network adapter or a RAID adapter, they are installed
in the appropriate slots.
Notes:
1. If your server came with a preinstalled network adapter, or if
you install this type of adapter, you must configure it as
described in your network-adapter documentation.
2. If your server came with a RAID adapter, or if you install one,
follow the instructions in the RAID adapter documentation for
configuring the adapter.
3. If your RAID adapter has a backup battery pack, you must
enable the backup battery pack before you can use the RAID
adapter.
The remaining slots are available for future expansion and growth.
For example, you can add adapters to provide communication,
specialized graphics, and sound. This extends the capabilities and
power of your server. Many adapters provide bus-master
capabilities, which enable the adapters to perform operations
without interrupting the server's microprocessor.
These expansion slots have Plug and Play capabilities. This feature
requires a configuration file (.CFG) for each installed EISA or ISA
adapter. See Chapter 3, “Configuring Your Server” on page 39 for
information about creating configuration files. When operating
Chapter 4. Installing Options 143


