


3. Remove the power source cable from the power supply faceplate:
•
AC power supply—Gently pull out the femaleend of the power cord connected to
the power supply faceplate.
•
DCpowersupply—Removethescrewssecuringtheringlugsattachedtothepower
source cables to the power supply using the screwdriver, and remove the power
source cables from the power supply. Replace the screws on the terminals and
tighten them.
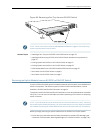
4. Loosen the locking lever screw on the left front of the power supply by using the
screwdriver.
5. Push down on the locking lever until it is in its lowest position.
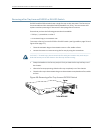
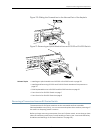
6. Grasp the power supply handle and pull firmly to slide it halfway out of the chassis.
7. Place one hand under the power supply to support it and slide it completely out of
the chassis. Take care not to touch power supply components, pins, leads, or solder
connections.
8. Place the powersupplyin the antistatic bagor onthe antistaticmat placedon a flat,
stable surface.
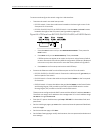
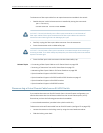
Figure 67: Removing a Power Supply from an EX3200 or EX4200 Switch
Related Topics Installing a Power Supply in an EX3200 or EX4200 Switch on page 132•
• Installing and Removing EX3200 and EX4200 Switch Hardware Components on
page 131
• Power Supply in EX3200 and EX4200 Switches on page 27
• Field-Replaceable Units in EX3200 and EX4200 Switches on page 18
• AC Power Cord Specifications for EX3200 and EX4200 Switches on page 102
• Rear Panel of an EX3200 Switch on page 8
• Rear Panel of an EX4200 Switch on page 11
175Copyright©2010,Juniper Networks,Inc.
Chapter13:RemovingSwitchComponents