


magicolor 330 - Base Engine Service Manual 5-31
Primary Fault Isolation Procedures
5.14 - Damaged Prints, continued
Step Actions and Questions Yes No
8
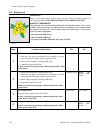
TRAY 1 INSPECTION
Inspect Paper Tray 1 and Tray 1 Feeder Assembly for debris or obvi-
ously broken components that could be damaging the paper as it
feeds out of the Tray and into the printer.
Is Tray 1 and the Tray 1 Feeder free of debris or broken compo-
nents
Go to step 9 Clean Tray 1,
or replace the
broken compo-
nents or replace
the Tray
9
REGISTRATION ROLL INSPECTION
1. Generate a test print and slide the Fuser Assembly out of the
printer just as the sheet of paper is moving through the Registra-
tion Rolls.
2. Carefully slide the Main Paper Handling Assembly out of the
printer and inspect the sheet of paper.
Is the sheet of paper undamaged as it leaves the Registration
Rolls?
Go to step 10 Replace the
Metal Registra-
tion Roll (RRP
9.43) and the
Rubber Regis-
tration Roll
(RRP 9.44)
10
2ND TRANSFER ASSEMBLY INSPECTION
1. Generate a test print and slide the Fuser Assembly out of the
printer just before the sheet of paper reaches the Fuser.
2. Slide the Fuser Assembly out of the printer and inspect the sheet
of paper.
Is the sheet of paper undamaged as it leaves the 2ND BTR?
Go to step 11 Replace the
2ND BTR
Assembly
(RRP 9.75)
11
FUSER INSPECTION
1. Generate a test print and slide the Fuser Assembly out of the
printer just as the sheet of paper exits the Fuser.
2. Slide the Fuser Assembly out of the printer and inspect the sheet
of paper.
Is the sheet of paper undamaged as it exits the Fuser?
Go to step 13 Go to step 12
12
FUSER FINGER INSPECTION
1. Slide the Fuser Assembly out of the printer.
2. Inspect Main Fuser for debris, broken or dislodged components;
such as the Fuser Fingers and the Upper Exit Guide.
Is the Main Fuser free of debris and broken or dislodged compo-
nents
Go to step 13 Clean the Main
Fuser or reseat
or replace the
faulty compo-
nents